
I am a huge wood grain fan and when I find MCM pieces which usually are walnut wood I am thrilled to give them an update. This 6 drawer dresser did not disappoint.
The warm white and wood combo is always a favorite of mine. How about you?
This vintage beauty was the seller's grandparents for as long as she could remember then her parents then passed on to her. When she saw the end results she was very happy to see the dresser given many more years of use in the future. Giving old things new life is my favorite part of my job.
The years of use left lots of damage on the dresser top. Not to worry this is the first step to address.
Here is a video tour before the dresser's transformation.
Neutralize the surface with clean water and scrub brush to remove any last remaining bits. Allow the wood to dry well.
While the top dries, remove the hardware.
The original hardware is very unique and will be kept. Put all pieces and screws in a container for safe keeping.
Then the entire dresser base and drawers are scrubbed inside and out to remove all past dirt, dust and grime. I use Dixie Belle white lightning cleaner mixed in a bucket and a scrub brush. When all scrubbed I hose off with fresh water and wipe dry. Again let everything dry well overnight.
Power sanding begins to smooth the walnut wood surfaces. I use my Festool rotex 90 round for all the surfaces on this dresser.
I start with 80 grit.
You can see the progress from original (L), in sanding mode (C) and after 80 grit (R).
The grits change 80-120-180.
Using mineral spirits on a blue shop towel allows you to see what the grain will look like stained and help to remove sanding dust.
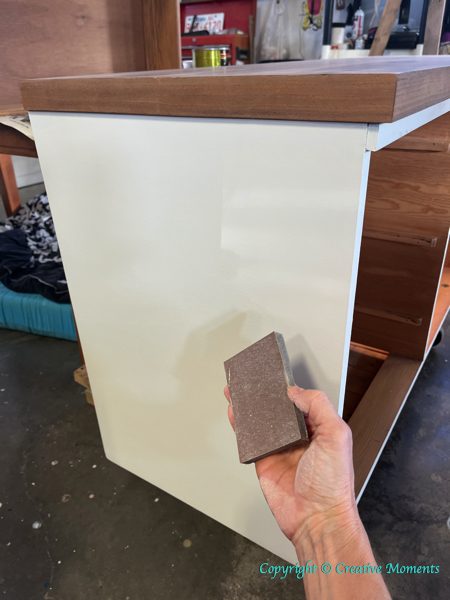
The body is scuff sanded with a Dixie Belle sanding sponge. This gives the paint something to adhere to as the original surface is very slick. The dust is wiped off and ready for paint.
The wooden drawer accents were power sanded to bare wood too. This took some time doing 12 round pieces. The feet that were removed were sanded down as well.
I like to stick the screw posts in a box to paint them easily. You can reach inside the box and turn if needed.
I tried the accent piece with one of its screws but it was easier to paint manually while holding the screw in place. Then let dry on an angled piece of cardboard with screw keeping in place.
After the first coat was dry, I sand lightly with a Dixie Belle sanding sponge. This keeps the surfaces butter smooth. Two plus coats of paint were applied to all the pieces.
Back to working on the top. Using my Festool power sander I went thru more grits: 80-120-180
followed by hand sanding with a fresh sanding sponge which is 220 grit.
Here is the top compared to the top of a sideboard (tutorial coming soon) I am working on at the same time. It shows just how different bare woods look sanded down.
A second coat of paint went on followed by a smoothing when dry with a sanding sponge.
Back to the top. I wanted to keep the natural wood color. I chose an oil based poly to bring out the wood grain and rich color.
Watch these 3 videos for the amazing wood grain pop
that happens when the sealer is applied.
I absolutely love it.
The wood looks fantastic. I applied two more coats. Each coat dried overnight, after being lightly sanded with yet another sanding sponge.
It aslo was applied along the sides of the drawer runner indents as well.
I did a test run of the white wood accent pieces with the original gold pulls.
The pulls have seen some wear over the years. To refresh them, they were given a few coats of pure gold spray paint. This color also took the brassy shine down too.
The drawer edges were up next. Originally I tried the warm white (middle drawer left photo) but thought this may bring attention to the drawers levelness. I chose umber silk mineral paint with an angled Dixie Belle Artist Brush.
It matched the original color well and made the edges disappear.
The hardware was all secured back in place.
The legs went on and this dresser is complete.
take a video tour
Links to the Dixie Belle products are for your convenience. My affiliation with this company does not increase prices on your end, your purchases via my links do however provide a small subsidy which allows me to keep providing these free tutorials. Thank you!
FEATURED ON
Hometalk
Mar 13, 2024
Shared on these fun link up parties


Beautiful!
ReplyDeleteThank you Robin!
DeleteWhat a heartwarming story! It's incredible to see cherished pieces like this vintage dresser get a new lease on life. Restoring and preserving family heirlooms must bring such joy to both the owner and the restorer. Great job on the transformation!
ReplyDeleteIn case you need info about furniture collection at lowest prices, take a look at here.
thank you
DeleteI am thankful to this blog giving unique and helpful knowledge about this topic.
ReplyDeleteDragonfly Furniture
:)
DeleteWhat a fun MCM dress-up! I'm not surprised the seller loved it! Thank you for sharing this with us at the Will Blog for Comments #78 linkup. We hope to see you next time, too!
ReplyDeleteThank you Jennifer, I appreciate your kindness
Delete