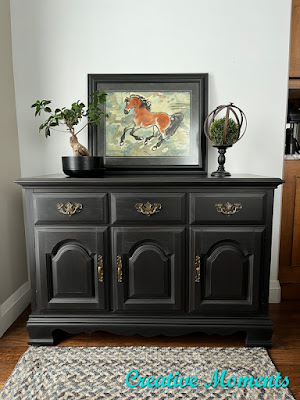
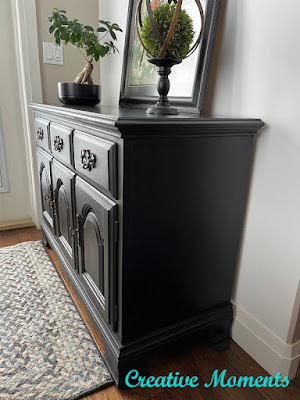
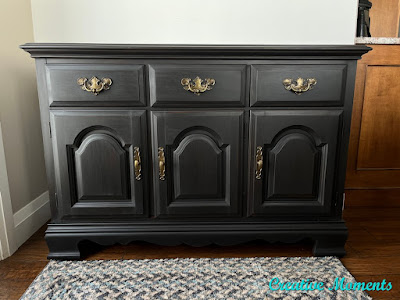
Sometimes it is just a change of color that gives a piece new life and become a focal point in a room. This solid sideboard was reloved in classic black making it ready to serve for years to come.
A quick wipe of the accumulated dust shows the pretty wood grain top.
Every surface inside and out were given a deep scrub to clean it all up after being stored in a shed. I use Dawn dish soap and a bit of TSP in warm water. I have a couple scrub brushes for different areas to get in the nooks and crannies. It is then rinsed with water till clean.
Any remaining water is wiped off with a towel and left to dry well.
Now lets get started. Stripping the finish off the top is step 1.
These 3 stripper videos showing the stripper progress
and how I use a metal scraper to help the process along
It took 4 hours to start lifting the old finish and an hour to scrape
After the last bits were scraped off (L) clean water is applied and scrubbed to neutralize the stripper as well as lift any small bits missed by the scraper. Wipe with a blue shop towel and allow to dry fully.
Power sanding the stripped surface was up once dry. Sanding grits 60-8-120-180 were used. Above is the first grit underway showing the remaining finish coming off.
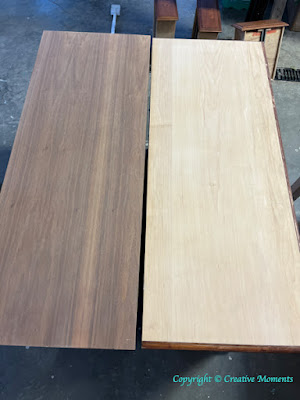
These are 2 tops I wa working on at the same time. Right is this project and left is a
Mid Century Modern dresser. You can see how very different these 2 wood species are when sanded bare.
Th top was hand sanded with a 220 grit sanding sponge. It is now ready to stain.
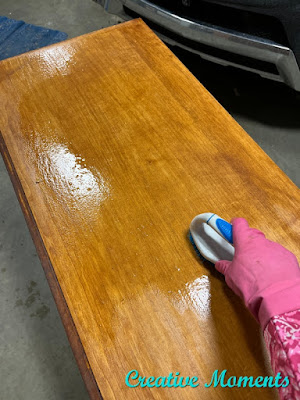
I started with Fusion's stain and finishing oil cappuccino color. I absolutely love this product.
I apply it with a blue shop towel.
SFO being applied video
This is the top done in cappuccino SFO. I wanted the brown tone to be first stain to soak into the bare wood similar to the body's original wood finish.
While the cappuccino was still wet I applied a coat of ebony SPO.
This is both coats wet on the top.
The next day I applied a second coat of ebony SFO but a ghost circle showed thru along the bottom middle edge. This mystery mark will not work so on with plan B.
Plan b was Fusion black gel stain & top coat. After a light sponge sand and wipe, a coat of this was brushed on. I use a chip brush to apply and let dry overnight.
Moving on to the base, I chose Milk Paint by Fusion in little black dress. Mix as per package directions and let sit for a bit.
HERE are other projects I did in this classic black milk paint.
Then brush on the surfaces.
My milk painting video shows how perfect it is for a worn weathered look that allows some of the wood to peek thru and give a rustic look.
The first coat of milk paint drying
and another coat of black gel stain & top coat went on the top again after a light sanding.
A second coat of milk paint went on the base.
After each coat of milk paint was dry, it was lightly sanded with a sanding sponge to smooth out any bits of milk paint. (L)
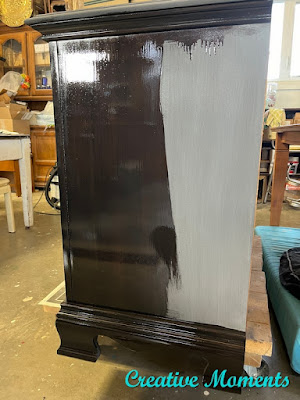
Homestead House hemp oil was wiped on to seal the milk paint. (R) You can see just how vibrant it brings back the rich black pigment.
The milk paint seems light until the sealer brings it back to life. Be sure to wipe off all excess oil after about 20 minutes.
Check out my hemp oil video.
Another coat of hemp oil was applied the next day. I posted this stage of progress on my
Facebook page and the sideboard was spoken for!
The piece was hauled inside to dry well before applying the hardware.
Another light sanding to smooth (L) and then the base was buffed with a soft applicator pad. (R)
Originally I had planned of putting on new modern silver hardware but the original hardware left an indelible mark. I sanded to bare wood, applied 2 coats of clear poly hoping to seal the wood grain then brushed on a brown paint with a opaque black coat the next day. Then it was the 2 coats of milk paint and 2 coats of hemp oil yet the ghost halo persists. This is when you stop fighting the new plan and keep the original hardware. But what color?
I put a poll on my
Instagram page to decide on the hardware color. Yes in my hast I set it in upside down :).
Hand down the votes were for original except one person. Original it is.
After scrubbed and dry, I used the same hemp oil rags I used to apply to the paint on the hardware. This just shines them up and gives a fresh protective coating. Buff well.
The hardware was put back on. For the back plates on the doors, a punch was used to sink the nail heads flush.
And this is how fabulous they look against the new black update.
I LOVE the new look. You?
The wood grain still peeks thru the super durable top too.
But after a few days there was a finish issue that arose. Here is what happened and how I solved it.
(tutorial coming soon)
FEATURED ON
Shared on these fun link up parties










Beautiful.🤩
ReplyDeletevisiting from InLinkz 297 Senior Salon Pit Stop - love the colour you chose and I like the fact you kept the original hardware. I blog at www.awandafulthing.com and love a good repurpose/refinish :)
ReplyDeleteThank you for sharing such kind words. I shall try and find you
DeleteI love following your blog seeing older pieces being reloved and sometimes repurposed. You give special care and attention to each piece as if it would be displayed in your own home. Great work!
DeleteThanks Diana :)
DeleteBeautiful piece. This post is one of my features at this week's SSPS. Thank you for sharing with us!
ReplyDeletethank you for the feature I will pop over to say hi on Monday's party :)
DeleteThis came out absolutely beautiful! Visiting from Marty's linkup.
ReplyDeleteWhy thank you!!
Delete