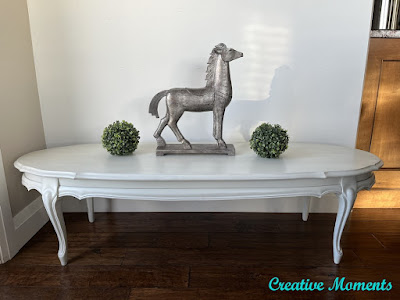
Solid wood coffee tables deserve updates to keep them in service. This French provincial beauty received a fresh new makeover in grey toned whites. It will be a look lovely addition to any living room.
My local pawn shop offered me this gorgeous wood table. I guess being in business over 10 years has its benefits in a small town. THANK YOU!
These pieces are so well built and have years of use yet to offer.....
And scraped off with a metal scraper.
This video shows how satisfying it is to remove old finish
The stripper is neutralized with water. At the same time the entire coffee table was scrubbed clean. Then left to dry well after wiping with a towel to remove excess water.
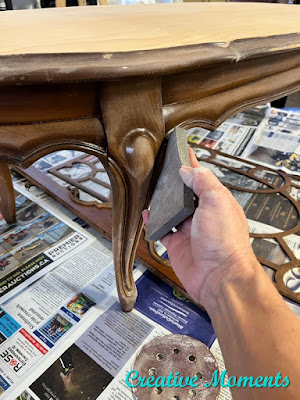
The base was scuff sanded with a
Dixie
Belle sanding sponge. This smooths the surface and gives the paint a bit more stick as the original finish is super smooth.
The top was power sanded smooth with my Festool rotex 90 going thru multiple grits to 180.
The top then had a coat of clear stain applied to seal the grain.
1 coat on ...
Then 2. These 2 coats dry 24 hours.
I have read lots that a green paint wash will take down red tones in wood. I watered down the new ivy green
Dixie Belle Paint color. (L) Then brushed it on and wiped back. (R)
Once dry it was given a light sanding with the
sanding sponge. This step is done after every dry paint step to keep the surface smooth.
then wiped with a Dixie Belle applicator
sponge. However once dry I was not a fan of this look at all. It was too green. Again it was lightly sanded.
Next plan was to apply magic white Dixie
Belle Voodoo Gel Stain with the mister and wiping.(L) Once dry it was sanded. However the look was close but a few areas not to my standard.
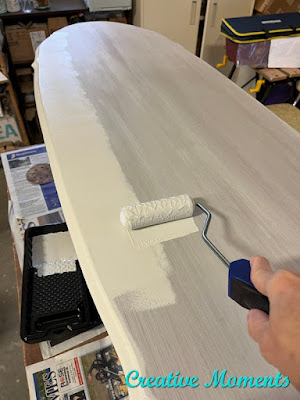
The roller sure made it easy to go under the table edges easily and fast.
Here is the first coat of oyster on the table. The base was painted the oyster
silk mineral paint.
Usually my shop dog
Harley is with me but today I have our 14 year old cat Mr Jenkins keeping me company.
I was not a fan of the roller painted top. It was a bit to textured. A light sanding was done yet again before applying a 2nd coat. This time I used the
Dixie Belle scarlet
brush with a light misting of water for the perfect coat.
To give added durability to the top,
Dixie
Belle Gator Hide was mixed with a bit of the oyster silk paint. I applied it with
Dixie Belle
big daddy brush. This wide brush makes short work of the passes to minimize brush strokes as does the added paint. Two coats went on.
grey wax demo video
Above you can see right side with and left without the grey wax.
Some grey wax was applied to the top and edges too. The wax was buffed with a blue sponge too.
Another video to help you see my process.
The final step was another coat of
Gator Hide brushed on all surfaces with a 2" mini brush to seal it all up.
Such pretty legs!!
Links to the Dixie Belle products are for your convenience. My affiliation with this company does not increase prices on your end, your purchases via my links do however provide a small subsidy which allows me to keep providing these free tutorials. Thank you!
FEATURED ON
Shared on these fun link up parties


The table is beautifully finished! I only have one thing to say that doesn’t work for me and that’s the green paint. A high quality stain blocking wood primer is a better option for blocking the reds from coming through. I’ll actually have to read up about the green paint because I’ve never heard of that before, although, something in my head is telling me it might make sense.
ReplyDeleteAnyway the finished product looks very much French provincial and you did a beautiful job!
Thank you for the kind words and suggestions. I agree on the green paint. That was my first and last time trying. I was going with the green stain suggestion in order to keep a wood grain top but this did not work IMHO. Paint with built in primer was the answer for sure.
DeleteI really admire your DIY skills (I have zero in that department!) The table came out beautifully and I can really appreciate the work that went into it!
ReplyDeleteThank you Leslie for taking time to share such kind words!! It means allot
Deletevery nicely done I would love to do something like this myself some tme. Thanks for sharing come see what we shared at http://shopannies.blogspot.com
ReplyDelete