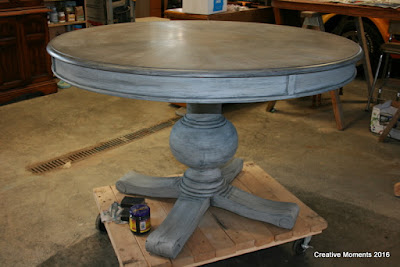
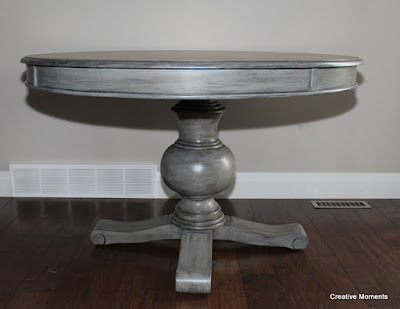
my Restoration Hardware version
*pic from Restoration Hardware website*
I love
Restoration Hardware but I hate the prices. So when I purchased this wood dining table I immediately saw it in RH greys.
The table is only 4 years old but it seems someone spilled something that ruined the finish but I saw the perfect challenge piece and purchased it knowing full well it would be made over into something useable. I started with my orbital sander but the finish was tough so opted to pull out the stripper.
so pour on the stripper and let is do its thing, bubble bubble... and scrape
and this is what is removed for one table top
but once stripped and sanded it looks like this, check out that inlaid veneer grain
time to get painting, I chose
Fusion Mineral Paint's line for this project, Little lamb from the Tones for Tots line and ash from regular line
here is little lamb mixed with water as a stain for the top
then ash added with a wet brush to add dimension
what do you think?
I just love the thick pedestal base..
and here it is with a coat of darker grey on the base.. Fat's Amanda Forrest Greysful
and the top view after a bit of greysful added too
this is my test board.. I added Fusions
antiquing tough coat to half to see the effect and I loved it
so on it went BUT I did not like what happened in the center when coats went over each other.. note to self.. don't cross areas
but more sanding helped to remove much of the brown/grey area
I added more ash on the final base coat, Fusion adheres so well I find sanding to reveal layers a bit harder so chose to brush on more colors as I sanded. I found the secret weapon to better detailing.. fingers! thankfully Fusion is low VOC and easy clean up so not a worry and it looks awesome
then hit the top with black glaze
and this is where it sits at day 2 left overnight to dry
the next day the top received 2 clear tough coats and the base had the black glaze treatment and again left to dry overnight. The entire table received another coat of tough coat and the top 2 additional coats.
Time to move in and photograph...
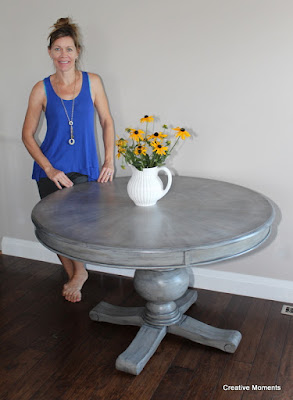
yes this is me, and the table. I usually am behind the camera but
Hometalk requested painter & project picture
so again, here is my version and the Restoration Hardware one.. what do you think?
photo from Restoration Hardware website
*Disclosure
I have received product in exchange for this post, but ALL the opinions are entirely MY own. This post contains sponsored links for Fusion Mineral Paint
Featured on
Linked up Parties


It's very lovely....maybe a bit shinier than RH's table, but the colors look pretty close. Great work!
ReplyDeletetrue.. I did use matte tough coats but they indeed are still shinier than RH or could possibly be my flash too ;) thank you
DeleteMy stars, you rocked that table! Your hard worked paid off, and your table looks amazing. Great job. Take care, Cynthia
ReplyDeletethank you Cynthia!
DeleteLooks so nice! Great job.
ReplyDeletethanks kindly Sharon
DeleteIt's beautiful.
ReplyDeletethank you Mary, coming from you I am honored ;)
DeleteWhat a beautiful table! I love the layered, textured look.
ReplyDeletethank you!!
DeleteGreat end result, love the quality of the paint finish, brings the table right up to date!
ReplyDelete