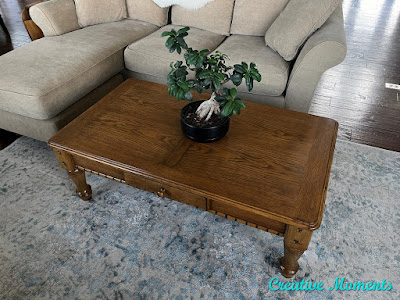
This sturdy coffee table just needed a warmer stain color to update it from the orangy original finish. So that is what I did, easy peasy.
The original finish was in great shape minus a few scratches on the top.
No Pain Gel Stain can be applied directly over existing finish but it will require a light scuff sanding. I use a 220 grit
sanding sponge after a good cleaning. Then the sanding dust was wiped off as well.
above is before on anotehr leg and after the stain was applied below.
then wiped off below for the final after color.
let me show you my gel staining technique
The drawer front shows the color difference of before and after best.
using the stain to dry brush edges for more definition
The coffee table fully stained and left to dry for a few days. Once dry it was again lightly smoothed with a
sanding sponge.
Black
best dang wax was brushed in the crevices to bring out the details more as well as over the entire top to provide a bit more sealing.
and it is complete, ready to get back to work.
the drawer has fun wipeable liner as well
Links to the Dixie Belle products are for your convenience. My affiliation with this company does not increase prices on your end, your purchases via my links do however provide a small subsidy which allows me to keep providing these free tutorials. Thank you!
FEATURED ON
Shared on these fun link up parties


Beautiful improvement!! I’ve always wondered how to “fix” orange furniture pieces so I appreciate you sharing your know-how!! 😊
ReplyDeleteThank you so much, you are most welcome. I love sharing my projects in hopes of helping others.
DeleteThe color made a beautiful transformation. Well done.
ReplyDeleteThank you very much Mom XOXO
DeleteI have that kind of orange furniture and your remake is just gorgeous
ReplyDeleteThank you for the kind words, give it a go :)
Delete