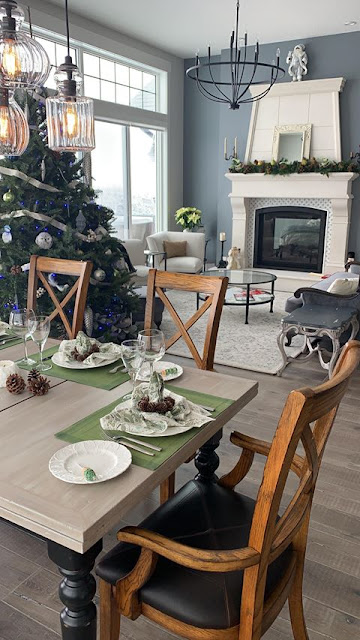
Recently I had a solid wood dining table brought to be custom painted in a rustic finish to go with its existing black base. I think it looks fabulous in its new home, how about you?

The solid wood table top was damaged during moving and was needing a fresh new paint job.

The large top surfaces were sanded outside again with my trusty Dewalt orbital sander. I was lucky enough to have a balmy winter day to sand outside.
The soft pine wood does allow for additional wear, tear and indentations from pen pressure.
It is character for sure but after a good power sand with 120 grit sanding paper, most were gone or softened.
Left is the less used end pieces that slide out to extend the table to full length. They were virtually "character" free.
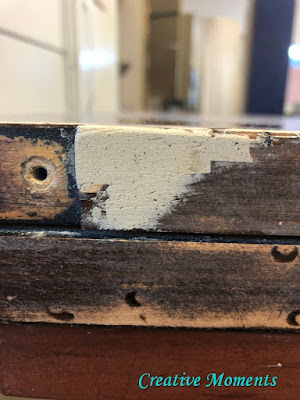
Now that the original finish was removed in spots Zinsser Bull's Eye spray shellac was applied to seal it back up for a uniform finish as well as sealing the wood now exposed.
And here is two solid coats of Sterling brushed on.
On the center portion the rest of the paint colors were applied in the rustic finish technique. Fusion Mineral Paint in little lamb was dry brushed followed with ash paint mixed into Fusion's glaze and topped with limestone dry brushing.
However once complete and set next to the flooring sample the colors were too cool. A change of plans was made to not use little lamb and ash glaze and replace with Fusion's Algonquin for the dry brush and glaze to warm the sterling up.
Here is how the center piece looks now after a complete repaint of sterling and the process of new colors completed. Here is the process in further detail.

The breadboard edges were taped off using painters tape so the grain direction was kept intact when doing them.
Algonquin was dry brushed randomly across the surfaces.
Algonquin was added to Fusion's glaze and it was brushed on with the grain then wiped back (shown on top piece above)

Then with a damp cloth it was wiped back even more.
The painters tape was switched to the painted side and the edges were given the same treatment.
Once the table tops had dried well over night, Tough Coat Matte Wipe-on Poly was applied with a damp sponge in 4 coats allowing each to dry for a few hours before the next was applied.
This adds durability to the table top as well as increases wipe-ability once all layers cure well for 30 days.
virtual table tour
was rubbed on. However with all the smooth layers it did not add a huge difference but just a hint was perfect.
Once back in it's home it was put back together with the black curvy base. This table seats 10 comfortably when extended to its fullest.
Thank you to the the customer for providing these great in home photos to show the table complete.


I've included Fusion Mineral Paint affiliate links for your convenience, making it simple to locate the products I utilized. Plus, by using these links, you'll save 10% on your entire order! Please note that I may receive a small commission from your purchase, but this comes at no extra cost to you and enables me to keep providing these free tutorials. I appreciate your support should you decide to make a purchase through my links.
I have linked items I use on my projects via my Amazon affiliate for your convenience. Rest assured there is no pressure to purchase nor is there any increase in price using my links. It is only meant to share what products I find useful.
email 6-18-2020
Shared At These Linkup Parties


What a lovely makeover on an old table! It looks 100% better! We would love to have you link-up at Tuesday Turn About via myweeabode.com ! Hope to see you there!
ReplyDeleteThank you Julie, always appreciate your kind words and hosting of your lik up party
DeleteWow, this is absolutely impressive! I agree--those pen marks and indentation do add character, but I'd just as soon have them sanded out, too. :) Visiting from the Wednesdays in the Studio linkup.
ReplyDeleteThanks Jennifer, rest assured the pen marks were indeed sanded out :)
Delete