These 3 antique pieces were dropped off to have a makeover. This sweet little table was the customer's grandmothers. It originally was the black stain still showing on the drawer knob but over the years it was redone. Years of use had it wobbly and ready to have an update. The customer wanted a bold change up. "I am not afraid of color." she says and this was the end result.
Let me show you what was done to create this new look. There are loads of photos and videos for this update. I even bought a tripod to help my video skills. :)
Harley, my shop dog always has to inspect new pieces when they come in. This table has such pretty curvy legs. I am excited to see the end result. The chairs were reloved as well in another tutorial.
This tutorial has many photos and videos to share the refinishing of this sweet table.
A good layer was applied to all the flat surfaces to start. Leave it to go to work until the finish starts to lift.
I scrape the gunk into a recycled tray.
I use an empty stripper jug to collect the gunk.
Then the stripper was applied to the legs and scraped off too.
The stripper needs to be neutralized with water after all scraped. I use a scrub brush dipped in the water to get the bits of stripper left in any areas and clean off the wood surfaces.
Above is a video of this neutralizing step.
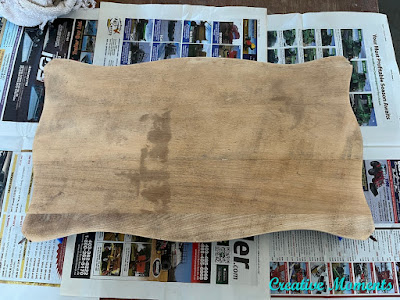
Here is the table all stripped, scrubbed and dried ready for the next steps.
Flipping the table upside down it was deconstructed totally.
Including this step to remove the lower shelf. Inset screws remain in the shelf portion.
You can see the old original black finish of days gone by and the broken edges on all the legs.
carbide scraping the edges video
Another angle of this carbide scraping process
Sanding the leg edges video which was the next step after scraping.
Videos showing the broken edges of the legs
One of the bigger chunks broken off the leg edge was glued and clamped. Other areas that were cracked with glued and clamped as well. All were left to dry well.
The table edges were scraped too with the carbide scraper. This tool is a must have if you refinish furniture.
Every surface was power sanded with my Festool rotex 90 sander. The small head gets into these small places easily. I worked thru sandpaper grits 80-120-180.
The original plan for the table is to stain it a natural water based stain color so wood filler was used to fill the repaired cracks and missing chunks where needed. Above is one leg top on each side getting filled.
The other legs with their wood filled repairs drying. The v crevice areas missing were built up as well. If the plan was to paint I would choose Bondo to make these repairs as it is much stronger but the pink surfaces do not take stain.
The Festool rotex 90 detail head was put on for the table edges to fit as close to the top nicely. The carbide scraper was used again to be sure the area at the top and edge junction were clear of all old finish.
This video shows carbide scraping on the under edge of the table top.
The detail head worked great for the drawer too. In the end I did take it completely apart as well, sanded all and glued and nailed back together.
drawer video
I used my 6" Dewalt orbital sander with 220 grit paper to go over all the surfaces. Above you can see the dark finish on one leg edge left to scrape and sand. In the right photo you can see the lovely wood grain sanded on 3 of the 4 legs with one to go.
All edges are hand sanded with a used 180 grit sanding disc.
The shows the leg edges in a video to better show the repairs.
To keep the V groove this super handy sander card worked perfect. It kept the angle with firm plastic card.
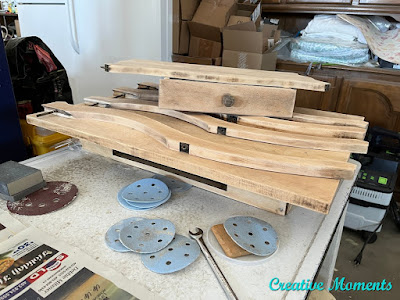
Whew here are the sanded pieces stacked. The sanding alone on this project has taken almost 5 hours.
The naturel stain went on the shelf portion as the test spot but the deep stains in the wood grain showed and did not give the look desired. I washed it all off and chatted with the customer about a plan B.
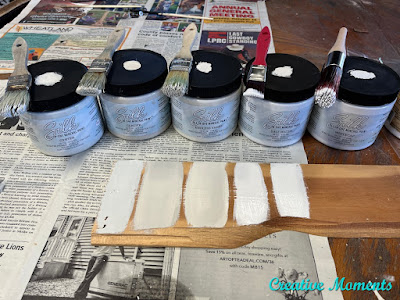
The first coat of endless shore going on the lower shelf painting video.
The above video shows the legs being painted.
The drawer knob was given 2 coats of white Dixie Belle BOSS to prevent the black or tanins left from popping thru the warm white. All lower pieces and all sides were painted 2 solid coats of this gorgeous color.
Between each coat the silk paint gets a light sanding with a Dixie Belle sanding sponge. This important step keeps this all in one paint super smooth.
The top was given a paint wash of the aubergine Dixie Belle Paint approximately 1:4 water. This video shows the mix.
This video shows how I applied the paint wash to the table top.
This is the first coat applied.
The layers continued sometimes with the help of a to keep the blend smooth. When each layer was dry they too were lightly sanded with a sanding sponge to keep smooth.
This is about layer 5 which is a deep rich royal shade of aubergine purple.
After 2 coats of clear on the top dried, the table was flipped over and reassembled.
And on the bottom side too.
And along the sides including the drawer runners. This makes the wood drawer slide smoother.
Flipped back over the entire table was sponge sanded and wiped.
After putting the base back together there was an edge that needed sanding, more filler and more sanding. Sorry my camera focused on the background :(
Using an angled Dixie Belle Artist
Brush touch ups were made where needed including the edges of the shelf that now show once put back together.
The edge was repainted in a couple coats with the artist brush too.
A final clear coat was applied to the table top and this cutie is complete.
table video tour
Links to the Dixie Belle products are for your convenience. My affiliation with this company does not increase prices on your end, your purchases via my links do however provide a small subsidy which allows me to keep providing these free tutorials. Thank you!
FEATURED ON
Hometalk
6-20-24
Shared on these fun link up parties


Love the transformation. The sound was better on some of the videos than others. Not sure why sign in to Google to access content kept popping up. Very detailed videos. The piece looks so good and reminds me of one I did, very similar,years ago.
ReplyDeleteThank you for your feedback. I will try and be sure to work on the sound ;) Lovely to hear you did a similar one.
DeleteOh my goodness - stripping the old finish off of wooden furniture is such an undertaking! Your table turned out lovely! I especially love that you gave new life to an antique table.
ReplyDeleteThank you, I love a good strip :) and a good relove to bring old pieces back to life ;)
DeleteI'm not really a fan of painting quality wood furniture. But this is a good piece of work.
ReplyDeleteThank you, I appreciate you sharing these kind words. Sometimes customers desires are not my usual choice either but I do think it turned out exactly like she wanted it and definitely gave the pice new life. :)
DeleteSorry but I will never understand why someone would destroy an antique/vintage piece of furniture by painting it. Why not restore it to the original stain finish. This is really sad.
ReplyDeleteDon't be sad, this is the customers wish to add her favorite colors to her home. Others prefer the original refinish. All are perfect options for each persons individual tastes. And in the future someone else may want to strip it back to original which is hte best part of solid wood pieces
DeleteIs it really necessary to strip the wood if you're going to paint it anyway? Although I have never used Dixie paint I thought that was the huge advantage to using it that you didn't even need to sand the surface?
ReplyDeleteGreat question - the answer depends on the original finish and the surface it has. If it is chippy and pitted and such like most antiques this will show thru paint. To have a smooth surface under the paint is very important and in order to get this one must sand it all smooth or save a few hours sanding and strip it then sand lightly. What ever you see will show thru paint is a good rule of thumb.
DeleteAs for this piece though I hoped the customer would choose to let the wood grain shine thru and refinish the top in a wood stain or white wash but she preferred color. Hope this helps with your question. Thanks for asking.