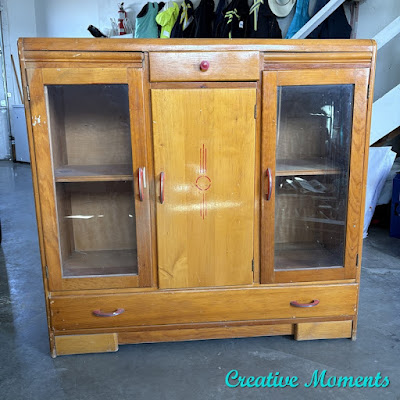
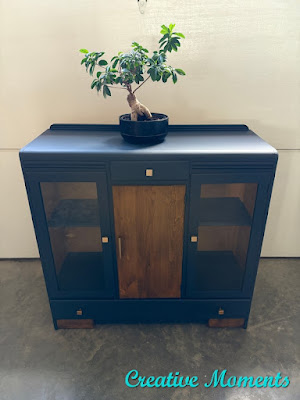
This Art Deco waterfall china cabinet, circa 1940, had seen better days. Tucked away in a shop and used as a storage shelf, it was in rough shape. A family member, inspired by a photo featuring rich navy tones and warm wood, wanted to see it brought back to life. With that vision in mind, I gave the piece the repairs and makeover it deserved — blending classic navy with warm wood to honor both its history and a fresh new style.
customer photo of it's former storage duties
customer inspiration photos
Dropped off and ready to be restored
This ole girl has lots of repairs to do, above you can see areas of wood broken off on both sides of one end.
L - warped drawer bottoms and R - missing wood on the front by the top drawer
and on the other end the lower edge has a chunk missing to name a few things. Over the years it seemed there was a spread in the base and a section of wood was added to the shelf inside to make it fit but it was removed and will get it all square as possible.
The first step, especially this antique pieces as they have been around for years is a good deep scrub. I use white lightning cleaner in a bucket of warm water and a bit of Dawn and scrub the piece inside outside and upside down literally to get every surface scrubbed. Then it is all rinsed well, dried with a cloth then left to dry completely.
After scrubbing the long drawer was laid upside down and weight added to flatten it back out as it dries.
The small divided drawer Was sanded to remove most of the old stains using my mouse attachment on my Festool Rotex 90 Sander.
The layered veneer dividers were split and warped so Titebond cold press glue was applied and they were left to dry under weights as well to repair.
Once good and dry it was time to address the body itself but first the glass needed to be removed. I used a flat edge on the multi tool to carefully pry the wood glass supports out. See another important reason in the right photo why to remove as well, even after a good scrub these areas still retain years of dirt, dust and such. These areas were vacuumed and scrubbed up clean now they are exposed.
And it is important to mark the pieces as to the spots they came from as well as the glass pieces as antique pieces were made by hand and most things only fit one way. This saves time trying to figure it out when reinstalling the glass. The sharpie also washes off the glass so no worries.
Titebond ultimate wood glue was used in all the loose joins, worked into the joint and wiped clean. This was done on all the loose parts after squared up.
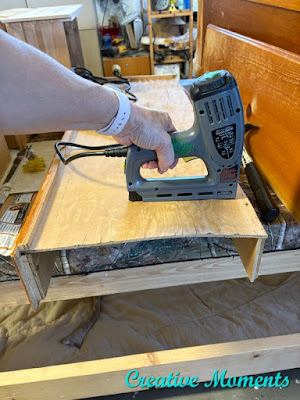
Holes were pre drilled along the back edge where the backing had lifted and was now back square as can be for a piece this age. The pre drill holes prevent and chance of cracking the old wood.
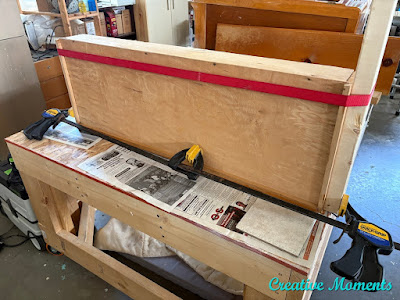
The backing was nailed back in place and clamps affixed to keep the cabinet square as the wood glue dried.
The excess was wiped with a damp rag.
Then a flat board clamped in place to keep it flush and flat while the glue dried. On the missing wood areas to the right of the clamps you can see pink Bondo filler drying. I use this OG car body filler on areas that need super strength and durability like these cabinet legs.
Bondo filler was used to build and repair all 4 legs. Above you can see the first layer sanded. It is easy to layer, sand and apply but be QUICK!! It sets up in short order which is another great thing about it. The repair work can be done easily in a days work. More layers were added after this photo till it was level and smooth and looking like the original wood.
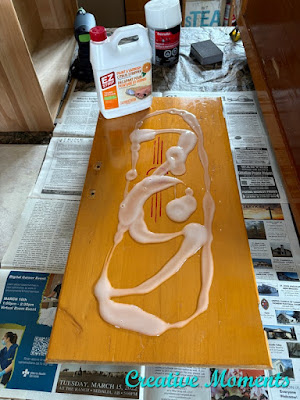
To create the 2 tone look the customer wanted, she chose the center solid door and 2 areas on the lower front to be stain. First they needed to be stripped of the original finish.
It was decided to add new hardware to the cabinet as the original was red plastic and had lots of paint splatters and such over the years. The pulls on the glass doors will be replaced with knobs so all hardware holes as well as many other dings were filled with DAP premium wood filler .
Now to address the long drawer. It was taken apart at one end and the grooves cleaned out well with my small carbide scraper.
The one end piece was split and needed to be secured with wood glue, clamped and dried before it too was affixed back in place with new brad nails and glue.
Then again with my husbands help as one needs 4 hands to do this, we squared the drawer with glue and clamped and secured to dry. He had the smart idea to use a ratchet strap for the one end as I had no more long clamps.
You can see the Bondo filler above used to recreate the missing pieces of wood now all sanded smooth.
More repaired areas with Bondo and wood filler sanded smooth along with the entire cabinet to help smooth the original finish that had many rough spots.
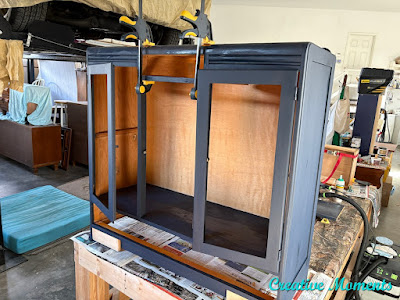
After the cabinet was set up on its new legs, the top area needed to be wood glued and clamped in place. The left are where wood was missing is now repaired too.
There has been a ton of progress done on the cabinet and after a damp cloth wipe it is ready to start painting.
It is a rich navy color. Above is the inside shelf and small drawer getting the first coat.
When it was dry, the paint and the filled areas were sponge sanded and wiped again with a damp cloth to remove dust.

With another blue shop towel, the walnut No Pain Gel Stain was wiped on the 2 base wood pieces. I used a recipe card to prevent the stain from getting on the paint
and on the door front. This walnut stain color is my favorite in this paint line. It is so rich. And gel stain does not need to be sealed if not used on a high traffic area like this door.
A second coat of the rich deep sea paint was brushed on. This paint has a built in primer and top coat which makes for a lovely 1 step paint, perfect for this decorative cabinet.
It is all coming together, the walnut looks so nice with the navy blue paint.
The customer chose new hardware - square copper colored knobs and pulls. Above I drilled new holes in the long drawer and put on the new hardware.
The pull she found was not 3" OC like original pull so I will fill the bottom hole with a wood dowel to be less noticable.
The dowel was nad cut to desired length and using wood glue pushed in the hole. Above it is going thru the backside of the door to be sure it goes in flush with the front side.
The back side was then painted the navy to match the cabinet's inside painted areas. I used the 2" mini and mini angled synthetic brushes for this project. They are my most used brushes.
Now to get he glass reinstalled. First was a good cleaning which starts with using a razor blade scraper (mine is really old but used often)to scrape off the old shellac and crud around the edges. Then both sides were cleaned well with a glass cleaner.
Then the glass was put back in the doors and the painted wood supports reinstalled to secure the glass back in place.
The new door pull was marked and a new hole drilled. Perfection. The new square shaped hardware pairs well with the art deco vibe.
It is so HARD to photograph navy blue to get the true color but it is even HARDER to photograph pieces with glass doors. I took many angles in hopes of giving you the best views.
a video tour
There were many more paint touch ups on the cabinet body but it is looking like a completely different cabinet now then when it arrived.
The customer approved the new look and was slated for pick up.
Being large I was not able to just bring inside to stage and photograph
So I tried many different spots and photo angles in my garage.
The lighting out there is however no the best to capture natural colors. It casts a yellow hue.
This project was labor intensive but so worth the end results allowing the cabinet to have many more years of use.
Thank you for reading to this point, I hope it inspires you to give an old piece a second chance.
Links to the Dixie Belle products are for your convenience. My affiliation with this company does not increase prices on your end, your purchases via my links do however provide a small subsidy which allows me to keep providing these free tutorials. Thank you! Please note the Amazon affiliate links are for your convenience to see the products I used as well. Ordering via the link may get me a small commission but does not affect your pricing. Thank you if you do choose to order them.
FEATURED ON
Hometalk Aug 19, 2025
Shared on these fun link up parties













You really brought this old piece back to life. Loving the deep navy color too!
ReplyDeleteThank you Leslie, I appreciate your kind words
DeleteBeautiful refinishing! I love seeing up-cycled and reused projects, It's respectful of the environment and the original materials. Beautiful project that you can enjoy for years!
ReplyDeleteThank you for your kind words Jeanne!!
DeleteWow, you did a fabulous job on this cabinet. Congratulations, you are being featured on TFT. I hope you stop by. https://eclecticredbarn.blogspot.com/2025/05/awesome-diy-projects-on-tft.html
ReplyDeleteHugs,
Bev
Thank you Bev for the kind words and the feature I appreciate that
DeleteSuch a transformation using your skills, patience and creativity to transform the tired cabinet into a work of art!
ReplyDeleteThank you ;)
DeleteYour talent and attention to detail turned this tired old piece into something that will give pleasure for years.
ReplyDeleteWhy thanks :)
DeleteYour talent and attention to detail turned this tired old piece into something that will be enjoyed for years.
ReplyDeleteThanks I appreciate your kind words
Delete