I shared this rustic black sideboard tutorial awhile back but about a week after it was complete disaster with oil marks and dry areas showing all over.
It totally threw me for a loop. What happened? How can I fix it?
Know there is always a fix :)
And that I will share my failures to help you avoid them.
I started by removing the hardware again.
I made the grave mistake of trying to touch them up in hopes of absorbing in the dry areas. Nope, that only added to the issues.
Luckily the head of Fusion and Homestead shared some suggestions.
It was caused possibly from uneven original finish or bare wood spots (nope), something coming up thru the wood (don't think so), not wiping back the hemp oil enough or perhaps not creating enough heat when buffing. They were baffled too at the photos.
1 - apply a light coat of the ebony stain and finishing oil that was used on the top, buff the surfaces well with an applicator sponge pad (or tight woven material or jeans!) and get some heat generated while buffing in circles. It did look good immediately after as show above but was NOT the answer as the marks came back.
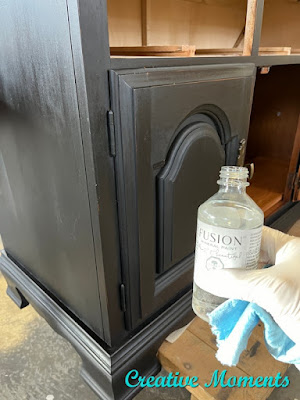
2- remove all the oil with odourless solvent, I wiped all surfaces with a blue shop towel soaked with it and rubbed well.
3- wash the surfaces well with TSP in soapy water to get any remaining oils and let dry well for a few days.
4 - sand the surfaces to smooth the painted finish and wipe again
5 - paint a primer coat of mineral paint. Above you can see the right door painted. But as the paint dried the same marks showed up.
6- I tried a second coat of paint. Still strange halos showing.
7- I sprayed the entire base with
Zinsser
Bull's Eye spray shellac. This is my go to sealer for any crazy bleed thru or marks and this solved the problem completely. I left for another couple days.
8 - The base was then painted with a black
mineral
paint. Each coat was sanded lightly between coats to keep it silky smooth. 3 coats in total went on before I was happy with the end results.
There is always a fix to any problem. It will however take time and effort that can be avoided by others when we share our lessons!! This is my hope with sharing my paint challenges.
The hardware was put back on and awaiting pick up by the new owners.
These lovely photos are from the customer in her home on display, Thanks Danielle!
FEATURED ON
Shared on these fun link up parties


Takes patience and pride to work through that kind of puzzle. Well done.
ReplyDeleteThank you, it was a test of patience for sure!
Delete