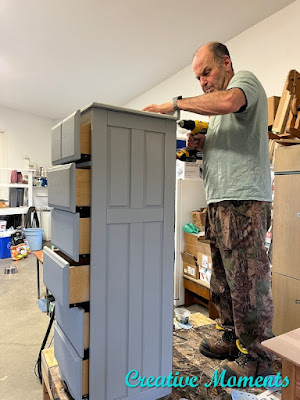

If you're a fan of clear coat pine, this makeover might not be your cup of tea. But for those who love breathing new life into old furniture, I hope this tutorial sparks some inspiration! The original clear pine finish has aged over the years, and the tall dresser has endured its fair share of wear and tear. With a little care, attention, and a fresh new color, it now serves a new purpose with renewed charm.
Remove hardware then clean the entire piece well. I used the spray version of white lightning cleaner. It is handy to get in all the nooks and crannies. Once cleaned I wipe with a clean damp cloth for a final wipe.
As per usual there is always a few repairs to do on a refurbished piece. This one had a broken wood piece glued with Titebond ultimate wood glue using their handy applicator. Then clamped in place and left to dry.
Seeing the body will be painted, I chose DAP premium wood filler to fill all the areas needing filling. This product gives a smooth paintable surface.
Again my Festool orbital sander was used to smooth along with some areas hand sanded and all dust vacuumed away.
It covers lots of area quickly and evenly and works well with this paint line.
From my extra pieces pile, I found a piece of solid hardwood that would work to replace the missing back edge from the top of the dresser. It was cut to size and painted to match.
My hand husband pre drilled holes then affixed it securely in place.
After the first coat of paint there is sometimes areas that show up that were missed in the wood filler steps. It is now that you fill them and sand smooth.
Then the second coat of baja gray was applied.
Here the drawers are getting their second coat of paint.
After each coat of silk paint dries, I give it a soft sand with a 220 grit sanding sponge. This keeps the surface smooth as butter or silk as the paint name inferes.
The dresser dried well before the original hardware that was cleaned was put back on. It works well with the new updated modern color.
This pine dresser now is ready for the future and sold within hours of posting.
Links to the Dixie Belle products are for your convenience. My affiliation with this company does not increase prices on your end, your purchases via my links do however provide a small subsidy which allows me to keep providing these free tutorials. Thank you! Please note the Amazon affiliate links are for your convenience to see the products I used as well. Ordering via the link may get me a small commission but does not affect your pricing. Thank you if you do choose to order them.
FEATURED ON
Hometalk Feb 14, 2025
Shared on these fun link up parties


The pine dresser looks incredible! You did a wonderful job of it. I am not a big fan of orange pine, but this piece now looks amazing! Visiting from Wednesdays in the Studio.
ReplyDeleteThank you I appreciate your kind words and glad you like it :)
DeleteLove this piece!! Great job as always.
ReplyDeleteThank you so much for your kind words, they are really appreciated
Delete