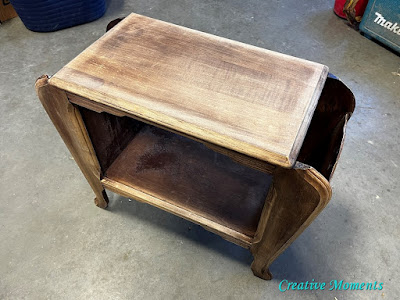
When I was offered this antique side table I was stoked as years ago, long before I did this for my full time job, I refinished one for our home. A matching pair would be perfect.
This piece was from the 1920's passed down to the daughter in law who gifted me the table, thank you Lorraine.
The lighting was terrible in this photo but here is the table ready for its makeover after a good scrubbing.
I power sanded the top but this finish is much more intact then the one I did years ago.
Especially on the sides so I pulled out my jug of EZ
Strip paint and varnish stripper and brushed on the sides while laying down. After sitting for a bit the finish was scraped off with a metal spatula. The table was flipped and repeated on the other side then on each end to do on the inner walls too.
One end of the bottom was missing its bracket and the wood was warped so I set a gallon of paint on a plastic dish to help flatten it out.
And I hand cut and new bracket edge.
And glued it in place and clamped allowing it to dry overnight.
Once dry it was back to removing the old finish. This step called for my trusty carbide
scraper from Richard tools. Both the 2" and 1" were used in various places to get the finish removed.
Power sanding the flat surfaces with my orbital smoothed the wood and also helped to remove finish.
Inside the magazine racks were done by hand with sanding paper and blocks after using the scrapers as far as they could reach as it is a tight area.
I splurged and bought a Festool RTS400 sander after doing a load of research that said it could be used for profile sanding. I tried it on the flat surfaces and it did well getting in the corners. I purchased the interface pads and gave it a go too.
But was so disappointed that it burned thru the simple profile edge even with the 2 pads. It was returned along with the dust collector that seemed to work well with it. It is just too pricey to have for an occasional flat surface.
Now what color should it be? I hauled it in to set by my existing one but I no longer have that stain color.
Above shows 1/2 the top left yet to apply finishing oil to.
And the first coat all on.
Allow the coat to dry well at least 9 hours. A light scuff sand then apply another coat and repeat steps. Three coats in total were applied.
And below here it is with my original one finished years ago.
Shared up at these great linkup parties


This turned out beautifully. I am a fan of art deco, and I love the natural color, it is perfect!
ReplyDeleteThank you, i totally never correlated art deco with this but you are so correct. Thanks!
Delete