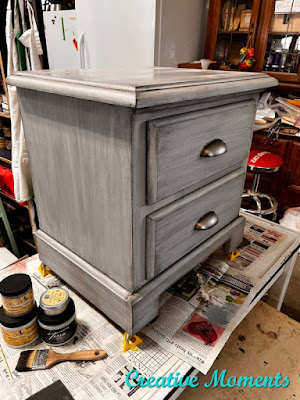
I took a dated 80's solid pine nightstand and gave it a new look. The base was cut in a modern shape and new cup hardware added. The paint color was done in a rustic shades of grey finish. I think it has a nice juxstposition of old and new to create new life for the piece.
After a good vacuuming and hardware removed, the night stand was scrubbed. I like to use Dixie
Belle white lightning cleaner in a bucket of warm water with a scrub brush. This gives a deep clean. Then rinse with my hose.
My initial plan was to sand to bare wood and possibly clear coat. To test this I power sanded the front edge down to bare wood. The knotty pine did not have mean feeling this look anymore.
When dry, the grooves were sanded flush with my Festool Rotex 90.
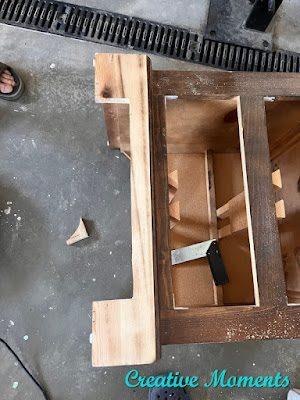
My handy helper used a jigsaw to cut the front edge. I had measured out a new look in pencil for him to follow.
The new squared edge looks more modern.
There were a few areas that needed a bit more white mud. I love my offset metal spatula for this task.
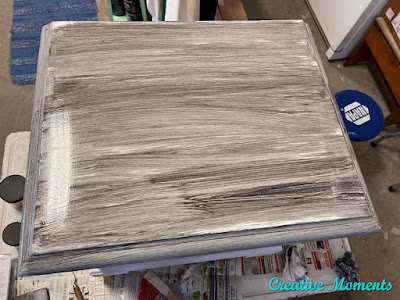
Another coat of fluff paint was brushed on with a bit of water applied via Fine
Mist Spray Bottle to get a nice coverage and blend.
This is the end look.
The grunge Glaze was brushed on one side at a time.
Using blue shop towel I wiped it off leaving a unique look. This step was left to dry well overnight.
These antique iron cup pulls from D Lawless Hardware are perfect update for the hardware on this piece don't you think? I love that they are dual mountable for 2 different sizes. It makes them even handier to have on hand to add new hardware to an old piece.
And the last step was to hand rubbed clear best dang wax on the top after the seal was good and dry. This adds another layer of durability and gives a soft near matte sheen.
Links to the Dixie Belle products are for your convenience. My affiliation with this company does not increase prices on your end, your purchases via my links do however provide a small subsidy which allows me to keep providing these free tutorials. Thank you!
FEATURED ON
Hometalk Sept 12, 2023
Shared up at these link up parties


Thank you for linking your post to SSPS and also hank you from your SSPS Team and Esme for sharing your various links with us at #268 SSPS Linky. I am busy designing and creating an access database of IG and FB links and handles as you share your links with SSPS.
ReplyDeleteIf you have an account please let me know your IG and FB information then I can add and easily tag you when you're in the top 5 and I promote your post. Feel free to email me at esme@esmesalon.com or in the comments
Awesome, thank you I have sent social links to You :) Thanks for hosting
DeleteThanks so much, I have now added your info to the database.
DeleteLooks great LeeAnn, doesn't even resemble the older outdated version now.
ReplyDeleteThank you VSG!! I too love the new look. Making old new again is my motto :)
DeleteHi LeeAnn! I would love to save this to my Pinterest I aspiration board but I still can't find how. There is no P anywhere. Help?
ReplyDeleteHi Cheryl. I know on my page I get the save to Pinterest but I added that on my browser as an add on. You could save directly from my Pinterest page I think https://www.pinterest.ca/lakuhn/creative-moments/, it is also linked on left hand side too under find me on social media :)
Delete