This bedroom suite is my biggest paint project to date. There are 4 pieces to the set; the chest of drawers, long low 8 drawer dresser and 2 nightstands.
This set is fairly common but has varying construction options. This one is the solid well built version. Approximately 30+ years old.
All the pieces had the hardware remove, the insides vacuumed and every surface washed to remove and past dust, dirt and grime. This process alone took over 2 hours.
Edges were sanded smooth where needed.
The set was in amazing condition for its years of use. There were a few spots that needed Dixie Belle mud.
Here are the products I plan to use.
The wood surface is super smooth and shiny. To be sure I had the best adherence I applied Dixie Belle Slick Stick. I did 3 of the pieces using a foam roller to apply it to the larger flat surfaces.
Let me show you how I use the roller and big daddy together in this video.
After use I clean my brushes.. and hands with my favorite Scrubby Soap.
Moving on to the chest of drawers I found a dried goo that would not come off with washing. I have a razor that works amazing for removing stuff like this. Once off it was recleaned.
Six hours in this was the progress. 18 drawers, 2 nightstands, 1 chest of drawers and one long dresser all were cleaned and 2 coats of slick stick applied. They were then left to dry well for 24 hours.
One 16 oz tub of slick stick was used for 2 coats on all 4 pieces.
One full coat on.
This video shows how I did it on a drawer front.
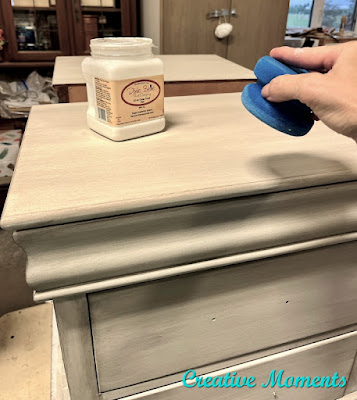
Grunge Dixie Belle Glaze was the next step the following day. Above you can see it on the top and bottom edges before moving on to the sides.
These video shows how I applied the Glaze. Above in part A I apply glaze with a chip brush
And in part C I use a stiff scrub brush to get even more texture on the surface.
This is the finished glazed look. Again an 8 oz tub of Glaze covered all 4 pieces.
See above left without and right with. It adds definition and detailing to the pieces.
black waxing video above
The hardware was cleaned and put back on after drawers put in right order.
And yes order matters allot of the time.
All the pieces have a whole new look.
As a final step I used my dedicated Dixie Belle best dang brush (its size makes this a fast task) to apply a coat of clear Dixie Belle's best dang wax on all the tops. It adds another layer of durability but also a bit more of a sheen for easy wiping. After about 15 minutes I buffed off the excess and this set is complete!
All the top drawers are lined with a pretty green velvet.
These 2 piece with drawers in are HEAVY. Seeing they will be picked up from the garage I do not want to attempt to haul them in to stage. This is usually when unnecessary dings happen :)
Links to the Dixie Belle products are for your convenience. My affiliation with this company does not increase prices on your end, your purchases via my links do however provide a small subsidy which allows me to keep providing these free tutorials. Thank you!
FEATURED ON
Shared on these great link up sites


I love this!!!
ReplyDeleteTHANK YOU for your kind words!! Means allot
DeleteWow! Fantastic job. The set looks great. Furniture paint jobs are so satisfying and you did a wonderful job. Great tutorial and thank you for sharing at the Home Imagined link party. XO- MaryJo
ReplyDeleteHoly smokes! That is SO much work redoing an entire bedroom set. I am beyond impressed. Also, the transformation is beautiful! Thank you for sharing this post with the Home Imagined Link Party.
ReplyDelete