
Does this reloved dresser look anything like the original? It went thru many changes to get where it is above. That is part of the fun using different products and colors on a project.
This piece was way more damaged then the sale photo looked. I should have declined when I saw the state it was in when I picked up but I can never seem to say no to a forlorn piece.
It was in even worse shape once I got it home and examined it. There were missing parts, damaged veneer, stickers and marker scribbles, missing pulls, a hole in the backboard, drawer were stained and it was in need of a deep clean.
Have a look for yourself with this video view.
The dresser was built with a solid wood frame, top and drawer fronts but wood veneer over pressboard sides. It is usual to see damaged corners and chipped veneer on the edges on well used pieces.
After the dresser was vacuumed out and wiped well, Dixie Belle mud was added to the chipped edges.
Of course many come with bonus stickers. I like a razor to get most off then spray orange oil for the glue residue. Then the drawers were scrubbed clean inside and out too.
I keep spare pieces just for projects like this. I happened to have a plastic drawer corner guide in my stash. It was securely added to the missing spot.
I also happened to have some plastic feet slides that were missing too.
Then brushed the excess over the sides and top for some texture.
While the drawers dried it was back to repairs. The front kick plate had a broken fastener. I cut a solid piece of wood,
glued in place and secured with clamps till dry.
The same was done to the back edge. Once the clamps were removed the next day, a new plastic foot was put on.
A big crack in the dresser hardboard backing was filled with mud on repair day and now was sanded smooth.
This same soft greeny blue serenity was stippled over the blue agave. I painted one dresser front solid serenity but then added more stippled blue agave over. Paint color plans change sometimes as you go. As you will see happens a few more times yet. :)
Then smooth the paper down as you go. I used the Dixie Belle
Thingamagig to push air bubbles as I went too. Then brush a coat OVER the rice paper once smooth.
Along the edges where excess hangs over, I lightly score the edges with a used sandpaper pad.
The paper was almost the perfect length but I did cut a piece to add all around the bottom edges. Once all the rice decoupage paper was in place it was left to dry well.
I found 4 vintage pulls in my stash as well. However 3 were shiny brass and 1 an aged look.
Neither really matched the distressed damask vibe.
After they were scrubbed clean and dried well, they were sprayed with flat iron spray paint.
The drawer bottoms needed attention next. Using my handy Dyson hand vac the edges were cleaned yet another time. The bottoms were painted serenity Dixie Belle silk mineral paint using a 2" synthetic brush that makes it easy to cut in the edges perfectly. This gave them a fresh new, easy to wipe look.
This was the progress so far but I was not loving it.
It looked much more unified but ??
Adding the pulls might help.
Solid color drawer front had the most votes so once again the fronts were painted serenity silk mineral paint. But it seemed not right still.
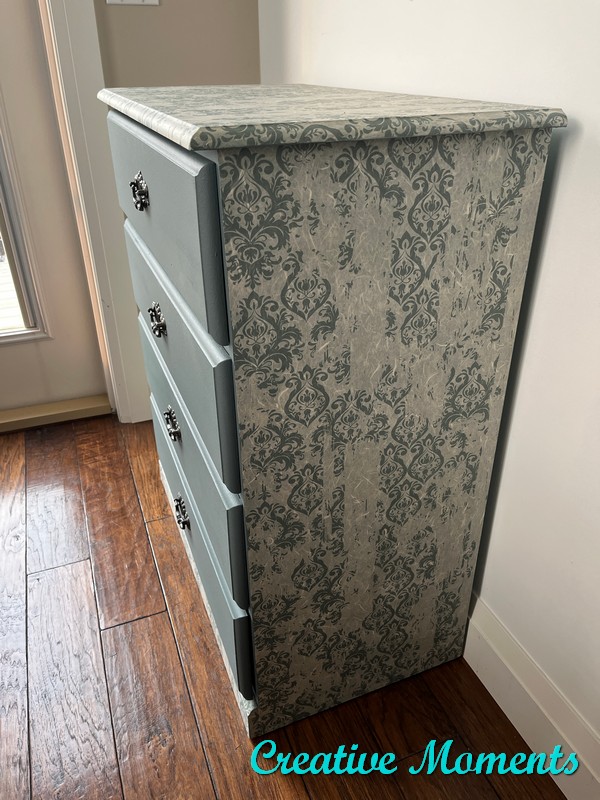
Stormy seas Dixie Belle silk mineral paint was suggested as a great match for this rice paper. Once the fronts were painted in it and set in I was much happier.
The front edges were painted in stormy seas as well.
The hardware was secured in place.
And it was hauled inside to stage.
There were allot of changes as the project progressed but that is the wonderful part about paint.
Links to the Dixie Belle products are for your convenience. My affiliation with this company does not increase prices on your end, your purchases via my links do however provide a small subsidy which allows me to keep providing these free tutorials. Thank you!
FEATURED ON
Shared at these great link up parties


What a lovely transformation!! You chose such a pretty blue color to pair with the damask. Thanks so much for sharing at Home Imagined this week!
ReplyDeleteThank you for your kind words. And for hosting a fun link up party too :)
DeleteAbsolutely love this!!!
ReplyDeleteThank you so very much, your kind words are very much appreciated
Delete