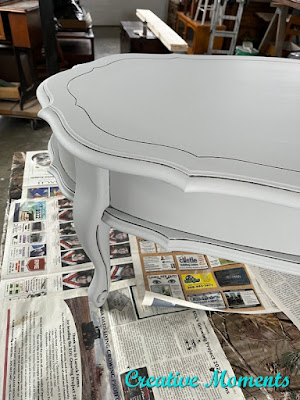
This custom French provincial coffee table was originally the owner's mother's. The clien wanted to keep it in her home but updated to a modern gray color. It was a rush order because her mother was coming to visit for Christmas, and my client wanted to have it reloved and back home in time to surprise her.
This was her reply when picking it up
"Wow, Lee Ann just love my new table, looks amazing. Thank you so much!!
The client looked thru all the colors to update the dark cherry finish on this coffee table. She chose
Dixie Belle silk mineral paint in soft Baja gray.
The first step is to always clean a piece well. I like to use
white lightning cleaner in warm water with a bit of soap and a scrub brush to get in all the nooks and crannies. Once scrubbed it is rinsed with clean water and dried with a towel.
There were some areas of chipping original finish on the coffee table that needed a
sanding sponge to smooth out. A damp cloth wipes away the sanding dust.
You can see in the table top grooves that this is a wood veneer over MDF. Another way to check for veneer is on the underside edges. Luckily most of the original finish is in good condition and just needed the chippy areas sanded smooth including the grooves.
With veneer and dark finishes, it is a really good idea to seal the surfaces. I used the gray colored
Dixie Belle Bonding Boss. This is a sealer and primer all in one.
Two coats are applied a couple hours apart then left to dry well for 24 hours.
Using another
sanding sponge, all the painted surfaces were lightly sanded. This smooths the surface in preparation for the painting step.
After each coat of the silk paint is dry, I again lightly sand with a
sanding sponge. Two coats were applied of the baja gray. Let dry well.
I was deciding between black or grunge grey
best dang wax. The grunge grey was too subtle, the client wanted a modern contrast so black it wa.
Using a fine
Artist Brush, the black wax was applied in the grooves then wiped back with a damp cloth to leave just the groove filled.
The crevices around the table skirt had the same application
On the other side I did the right half to show the difference the black wax makes.
The grooves in the top are much bolder and easier to see the added detail it gives the coffee table.
This video shows how I did the black wax process.
I send progress photos to my clients as I go along to be sure this is the vision they had. She was a fan of this look.
So the entire coffee table had all crevices and details black waxed.
For an additional layer of durability, I added clear
wax to the table top and buffed to a soft sheen.
Before and after in the clients home
Links to the Dixie Belle products are for your convenience. My affiliation with this company does not increase prices on your end, your purchases via my links do however provide a small subsidy which allows me to keep providing these free tutorials. Thank you!
FEATURED ON
Shared on these fun link up parties


Amazing transformation, love the white you used
ReplyDeleteThank you for sharing and participating at SSPS 346. See you at #347
Thank you very much :)
DeleteSuch a beautiful makeover LeeAnn.
ReplyDeleteThank you for sharing your beautiful coffee table makeover at Create, Bake, Grow & Gather this week. I'm delighted to be featuring your project at today's party and pinning too.
Thank you for the feature, I love your weekly link up party!
DeleteA lovely transformation that would enhance any living space. Well done.
ReplyDeleteThank you, her Mom was very pleased too with the makeover her daughter had done to her table from years ago
Delete