After & Before wall cracks caused by settling.


I would have never thought I'd have stress cracks on my new house, but they happen. It has been over 10 years since we built our house and it was high time I addressed them.
Here is a guide to my process:
1. Scrape off the cracked drywall. I used my handy carbide scraper for this. 2. Fill in the cracked areas using DAP DryDex spackling. It comes in pink and dries white so you can track where it's applied. 3. Apply stress crack tape. (I saw this on an Instagram influencer's page and had to try it) 4. Paint - I used a foam brush to paint the tape our wall color on the first coat.
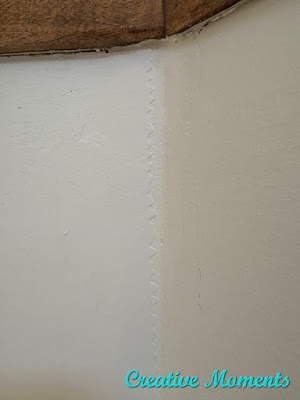
5. The tape looks much better after a couple of coats.
Three areas needed work, the 2 above are at the stairwell head, one on each side and one in the entry way.
The entry way wall above after scraping.
This product goes on pink and dries white allowing to see where you put it and when indeed it is dry thru.
Unroll the amount of tape needed. cut off, peel off the backing as you press firmly to the wall.
I painted the tape our wall color using a 2" foam brush for the first coat.
Stress tape recommends using a roller but with such small areas the foam brush worked well.
painting the tape video
The serrated edges of the crack tape are still visible after a couple coats of paint. Being OCD, I needed to fix that.
I feathered more spackling out from the edges and when dry (L), sanded smooth then repainted this time with a 2" angled synthetic brush. (R)
The stairwell head is looking great now.
As is the front entry wall.
Please note the Amazon affiliate links are for your convenience to see the products I used as well. Ordering via the link may get me a small commission but does not affect your pricing. Thank you if you do choose to order them.
FEATURED ON
Shared on these fun link up parties


Thank you for sharing these tips. My house is much older and we need to take care of a few stress cracks - again. This post will be a feature this week. #HomeMattersParty
ReplyDeleteThanks for the feature Donna, see you then :)
Delete