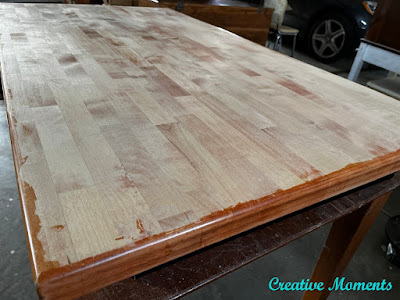
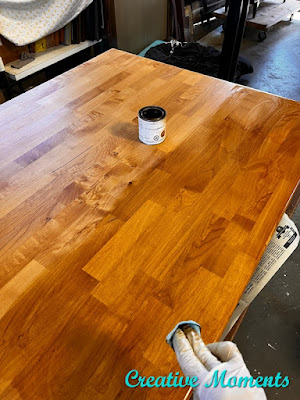
It might be hard to tell the difference in these two photos. That perhaps means I did my job.
Below is before and above is after.
This butcher block dining table top was brought to me to refinish. The clients wanted just the top refinished as over the years it had become worn and tacky in places.
The black base and chairs remained at home awaiting the newly restored top.
The table top was hard to photograph well but as you may be able to see the one corner was worn most. The entire top was wearing and sticky in places.
It was time to rejuvenate it.
Now to let it sit and do its job.
Scraping off the finish video
Neutralizing the stripper video
I use a scrub brush when neutralizing the stripper. It also gets the semi loose bits off really well.
This is after the table top dried. I did not strip the edges as to avoid a messy work area. These edges will be power sanded off.
Power sanding the edges video
Using my Festool Rotex 90 I began with 80 grit paper. 120 then 180 were used next. Using my Dewalt orbital I finished the top up with a 220 grit.
The beautiful butcher block top all sanded to raw wood.
I am a huge fan of
Fusion
Stain & Finishing Oil for table tops. I tested the edge with a bit of pine color and sent to the clients. This is very close to the original color it was and what they wanted again.
Check out my applying the SFO video. I apply with blue shop towel and wipe the excess with a clean sheet after about 15 minutes.
Check out many more Stain & Finishing oil projects
HERE
It absorbs right into the wood grain and makes it pop.
This is also what makes it such a great product for a high traffic area.
I let the coat dry over night.
After each coat was dry I lightly sand it with a fine grit
sanding sponge. I am a huge fan of the natural on this butcher block top.
After the second coat of natural, I applied a coat of pine
Stain & Finishing Oil while it was wet to blend together. Another overnight dry time.
Again the dry coat was lightly sanded. This keep the finish butter smooth.
Three more coats of pine oil were applied. Three more light sandings followed when dry.
This is the table top's end results.
My last step was to sand the top with a paper bag. This is like using a 1500 grit sandpaper. It just buffs the finish that much more.
The clients picked up their refinished top and returned it back to the rest of the dining table. It is now ready for many more years of use.
FEATURED ON
Shared at these link up parties


.jpg)

Beautiful work! I'm partial to dining room tables because family life happens there!
ReplyDeleteThank you I agree, center of the family gatherings for sure :)
DeleteAWESOME tutorial! I’d love for you to join us over at the Creative Crafts Linky Party every Wednesday through Sunday
ReplyDeletehttps://creativelybeth.com/team-creative-crafts-linky-party/
Followed and Pinned!
Creatively, Beth
Thank you Beth, I do try and join each week on your fun linky party :) Thanks for hosting each week.
DeleteWe recently were given a tabletop similar to yours LeeAnn. It is in pretty bad shape, but I am thinking if I follow your steps here, we will be able to bring it back to life. We are planning to have it outside so we can have a nice spot in our yard. Thank you for sharing your work!
ReplyDeleteI bet you can save it :) cheers!!
Delete