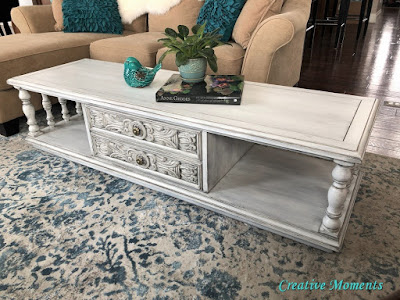
What better color for this ornate vintage coffee table then layered farmhouse whites?
This solid wood Lane; made by Knetchel Furniture coffee table begged to be given an update. The ornate details and curvy spindles needed to POP.
Some light shade will do just that but first it was spa time.
The entire coffee table was scrubbed inside and out before it was power sanded with my
Dewalt orbital sander and
120 grit paper. This smoothed the years of wear and dings found especially on the edges. All sand dust was removed with a damp cloth and left to dry.
I ordered
Shackteau's milk paint in sand and kettle cove green which I used on an
antique waterfall vanity. I love milk paint on antique and vintage pieces as it is so fitting to the look of that age.
Two coats of the sand milk paint were brushed on using a
Zibra
2” angle brush for the first 2 layers of this project.
Email me
before distressing
Then everything was sanded smooth with a
sanding
sponge including distressing the edges to keep the vintage vibe.
after distressing
See the black wax on the top versus plain on the bottom?
Actually the last step was the hardware. The pretty original hardware was just scrubbed clean and look at what scrubbing with just a
green scotch pad revealed on the left. A pretty antique gold finish!
And it is complete! Did I forget to tell you it has large casters that make moving it super easy.
Scroll to the bottom to see a video tour of this beauty.
FEATURED
Email 3-28-2020
Shared at these link up parties


Comments
Post a Comment