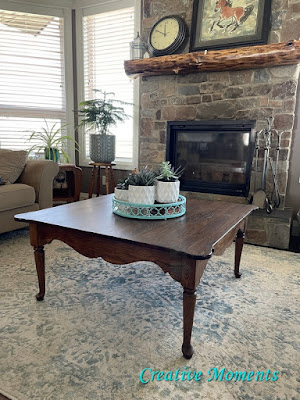
Have you watered plants and not noticed the pot leaked a bit of water causing a dreaded water stain? Water sitting on wood is never a good idea and usually does damage.
I had a good customer drop off her antique coffee table that had this happen to. However hers also involved a large metal tray that when moved left large black water damaged rings.
The wet metal and wood created a deeply engrained stain that she tried to sand out by hand (you can see her attempts) with no luck what so ever.
Time to bring out the big guns; AKA my Dewalt orbital sander and 80 grit paper.
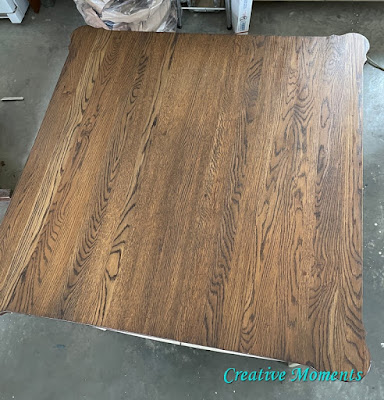
This removed the old finish and a bit of the stain as I moved slowly along.
Going slow and letting the sander do the work is key, don't rush the sanding step.
The sanding also reveals deep gouges over the years of use. This antique coffee table was refinished years ago by the owner so this is not the original finish.
The next pass was with 120 grit sandpaper and this was almost 3 hours in.
I read online that hydrogen peroxide may help so tried it on the remaining stain but it did nothing.
Hauling it back outside a few days later I moved to 180 grit and again moved slowly over the top then to 220 grit and this is what another hour of power sanding achieved. So much better!
I used a damp cloth with a bit of
Fusion TSP
Alternative in warm water to wipe the top. Wiping the sanding dust does also show where the stubborn stain was in the faintest halo. It was now lightly hand sanded and wiped clean with a dry cloth.
Wanting to match the existing base yet keep an antique finish I chose
Fusion
Stain & Finishing Oil in cappuccino to seal the wood and give a lovely satin sheen top. I apply with a blue shop towel in a gloved hand.
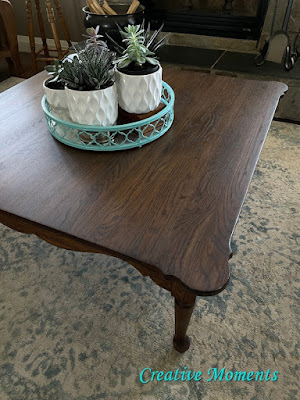
Just look how it enriches this amazing wood grain.
The color is close but not exact but adds to the one of a kind antique feel.
I wanted to do the next coat in natural
Fusion
Stain & Finishing Oil but it has been backordered for awhile now so I went with another coat of cappuccino. Each coat will deepen the color and add more protection.
However panic set in when the formerly black stained area took the second coat a bit more uneven.
Once it dried for 24+ hours I lightly sanded it with a fine grit sanding pad to even the sheen and voila!
I love to share different angles for you to see the change, there is a video tour at the end as well.
video tour


Stunning work! I am currently in the process of removing old stain too and it does take a long time. I really admire the outcome of this project. I'm sure you customer was thrilled too. #HomeMattersParty
ReplyDeleteThankyou Donna, patience is the biggest thing I have learned from my 8+ years doing this.. that and everything can be fixed :) The customer was very pleased which always makes the time spent worth it . Thanks for hosting!
Delete