A customer offered me her solid pine coffee table set to relove and rehome, how can I ever say no to giving pieces new life? Solid wood furniture is hard to find these days unless high priced so I knew these would not take long to find a forever home once refinished.
The dark all over stain makes them look chunky and dated, let's lighten them up.
There are LOTS of photos for this project, I hope sharing them all helps you see how I gave these pieces new life.
I started with one end table hauling it outside to power sand the top to bare wood.
I started with 80 grit and made my way thru 100 - 120 -150 to 180.
The bare wood was revealed on the entire top.
Big difference already right?
Both end table tops complete.

Now to tackle the big coffee table.
The tables had been well used but being solid wood allows them to have 95% of the dings and scratches removed during sanding.
Here is a sanding video of just how damaged the tops were and how sanding fixes that.
After a couple hours of power sanding I had all the tops back to raw wood.
Next step all the bases were thoroughly cleaned using a spray bottle with a Dixie
Belle white lightening cleaner & water mix in it and a rag. Once all was wiped well a second cleaning with clean water was in order. All sides and under all sides too, be sure to get all gunk and grime from years of use OFF!
Here is a short staining video
Here is the first coat going on, the antique fold down edged table had a coat as well. It was applied over and existing finish that was light so you can see the difference raw wood makes absorbing the color.
Once coat complete and left to dry overnight.
A better shot of both with one coat.
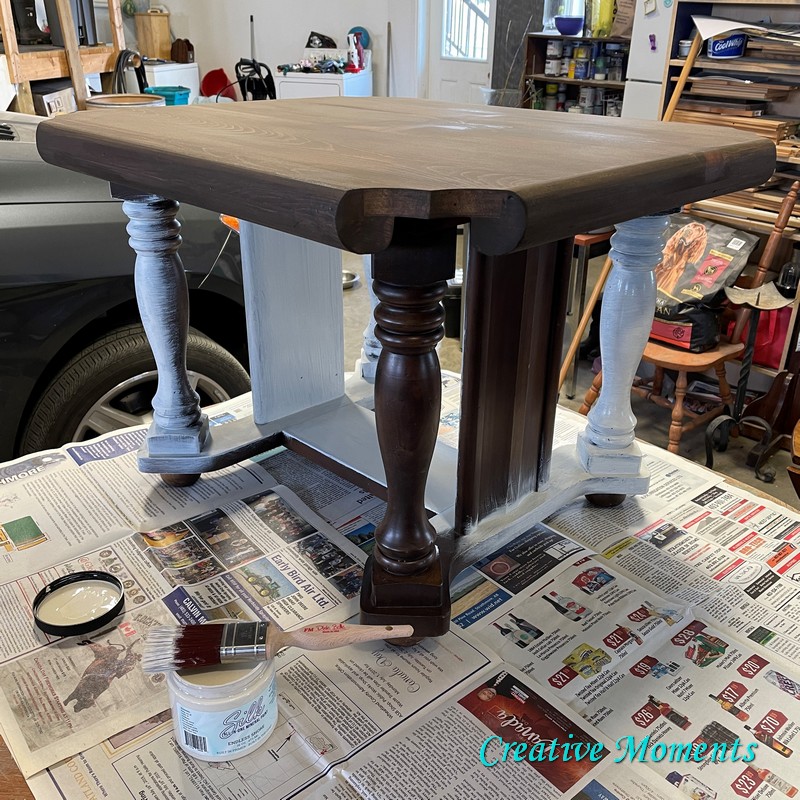
I pulled out my trusty Dixie
Belle Paint in drop cloth and painted the other end table base shown above on the right. Much better right? Then I went back and wiped off the silk paint with a damp rag.
To apply the drop cloth I used Dixie Belle best
dang brush, this large natural bristle brush holds loads of paint which speeds up painting.
However it is not great for the areas that need a nice crisp line, for these areas I used a Dixie
Belle chip brush.
Now all the bases were completed in one coat of drop cloth and the tops in walnut gel stain.
But before I applied the clear coat I did a light sanding with Dixie
Belle sanding sponge. I repeat this step between layers of clear coat as well to get a super smooth surface.
Two coats were applied to each table top.
My shop assistant Harley likes to supervise all stages of progress ;)
You can see the drop cloth only on the left side above better in this pic.
I thought I might like to take the sheen down a bit so after a light sand I applied a coat of Dixie
Belle satin flat coat again applying with the damp sponge.
The end table above shows wax again on right side and none on left. A poll on my Instagram had the votes split almost 50/50 as to preference. I personally liked the more rustic farmhouse look with the dark wax so did all the bases with the brown wax.
And they are complete! This set sold in a few short hours.
a couple video views
This view shows the flat sheen a bit better
Links to Dixie Belle products are for your convenience. My affiliation with this fantastic paint company does not increase prices on your end, your purchases via my links does however provide a small subsidy which allows me to keep providing these tutorials. Thank you!
Shared at these great link up parties


Awesome!
ReplyDeletethank you for your support :)
DeleteBeautiful. They took a bit of work, but worth it. Thanks for sharing at the FWF party.
ReplyDeletehugs
RR
Thank you for your kindness, indeed they did but so worth giving new life to :)
Delete