This oval coffee table was custom refinished going from a glossy orange stain to more matte warm walnut.
Thank you Donna (table owner) for creating this great above before and after graphic.
The before pictures were taken by her as well. The oval beveled glass top was left at home while it came here for its makeover. The customer picked it up on marketplace loving the shape and size for her space but not the finish. She knew this could be changed with a vision of a warmer stain color.
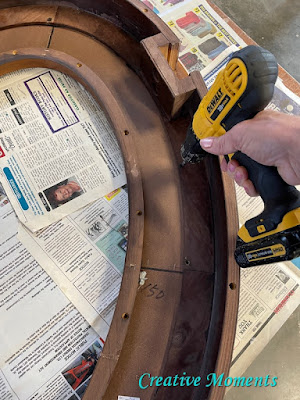
After a good damp cloth wipe down I flipped it over and removed the screws holding the "leather" inset portion and center portion in place.
The legs were solid wood so I power sanded the existing finish off one to see what it looked like.
The coffee table outer top was solid wood as well so next step was to power sand it down to bare wood too.
The apron/sides are very thin wood veneer. This was visible under the chipped edge I wood filled with
Dixie Belle mud. I avoid power sanding this type of veneer seeing it is so thin and easy to sand thru. Light hand sanding smoothed the wood filler spot and gave tooth to the veneer for painting.
The solid wood pieces were power sanded in grits 100/120/150 followed by a hand sand to ensure a nice smooth finish.
The inner ring is pressboard/fiber and also not recommended to power sand. I used the 150 sand paper to hand sand the finish off the top and inside edge.
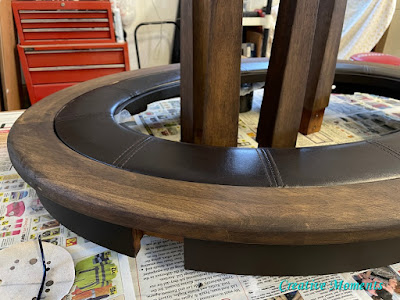
I set all the pieces together to share with the customer to confirm the stain and paint color plan.
The edges on the apron and inner oval were painted in a dark rich brown
Dixie Belle Paint color called coffee bean using the small flat
Dixie
Belle synthetic brush. This size was perfect to smoothly apply the paint on both surfaces. I also like to do under the edges of the apron and the top edge.
The coffee bean color matched almost perfectly with the dark "leather" inset portion giving a harmonious look and connecting the sides/top look together.
Then the paint was sealed with walnut
Dixie
Belle No Pain Gel Stain applied with a blue shop towel. This step is not necessary but will give an even more cohesive look between the painted and stained areas.
stain application video
I set the leather portion next to it all once dry and the customer loved the tones and liked the coverage of one coat.
The stain was left to dry then lightly sanded with a clean
Dixie
Belle sanding sponge. This gives the surfaces a buttery smooth feel.
To add a bit of additional durability seeing it is a coffee table I chose
Dixie
Belle Howdy Do Hemp Oil to seal the stained surfaces. I applied it with a soft
Dixie Belle
applicator pad. I flipped it over to wipe off the access after about 15 minutes. 3 coats of oil were added to get a fully soaked in surface.
When all was dry the surfaces were buffed, the table reassembled sans the beveled glass and it was ready to be picked up and head home.


Links to the Dixie Belle products are for your convenience. My affiliation with this company does not increase prices on your end, your purchases via my links do however provide a small subsidy which allows me to keep providing these free tutorials. Thank you!
FEATURED ON
Hometalk Nov 23/22
Shared up at these fun parties


Comments
Post a Comment