Sometimes, a piece just begs for a splash of new color. This wooden magazine rack has certainly seen better days and is crying out for a makeover. Like many of my projects, I started with one vision but had to pivot to plan B midway. In the end, plan B turned out to be the perfect classic update!
The fresh, crisp new look really revitalizes the magazine rack. The chosen color not only complements most existing decors but also adds a touch of modern flair. It's amazing how a simple change in color can make such a big difference, giving it a modern and stylish vibe, brightening up a space and adding a touch of elegance.
Step one disassemble the rack by flipping over and removing the screws.
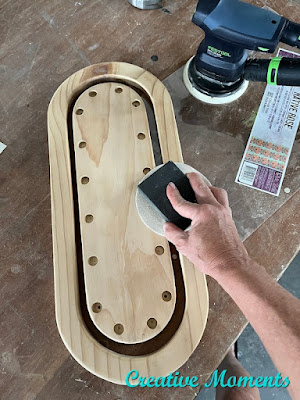
Now to remove the worn and chipping old finish with my Festool rotex power sander. The mouse attachment works perfect to get into the curved edges and tight spots.
My Festool orbital sander was perfect for the flat surfaces. The wood grain pops once the old finish is removed on the top piece especially evident when put next to the base.
Progress on the base showing how easily it is to get back to bare wood.
After going thru the grits with the power sanders I always hand sand the bare wood surfaces as a final step. All the dowels were hand sanded smooth as well. Then all pieces were wiped to remove and sanding dust.
My plan A was to stain the top and base with a white Stain & Finishing Oil to keep the wood grain visible
applying the stain oil video
And paint the side dowels solid for contrast. I chose salt water Dixie Belle silk mineral paint. I used the existing base as a stand for my dowel painting. Most of the dowel was painted leaving a portion of wood bare to sit in the holes. By the time I got around the circle hand painting the long edge I could flip and paint the remaining wood ares and put the dry end in the hole.
painting video
They were then left to dry well and the process repeated to have 2 solid coats on the dowels.
The stained top and base when set together just did not work as I had envisioned. The grain of the wood just did not pair well with the solid sides.
So the top and base were painted the solid white silk mineral paint. This paint has a built in top coat making it the perfect 1 step paint.
Yes I prefer the solid crisp clean look. Both base and top were given 2 solid coats.
And when good and dry put back together. This part was challenging to get all the dowels in their respective holes on both ends without and scratches. This required patience and persistence but it was done then the screws back in place to hold it all together.
The wood fitted ends had a few wee gaps that were easily filled with some white Dixie Belle mud. Then when dry it was sanded smooth and touch up paint brushed on.
It is now ready to put in many more years of service.
Links to the Dixie Belle products are for your convenience. My affiliation with this company does not increase prices on your end, your purchases via my links do however provide a small subsidy which allows me to keep providing these free tutorials. Thank you!
FEATURED ON
Shared on these fun link up parties


Looks very different from the tired wood color. Nicely done
ReplyDeleteThank you very much, classic white is always a nice change up
Delete