This Roxton crafted solid maple coffee table has been meticulously refinished with a warm walnut stain, beautifully complementing the lighter-toned walnut stained base. This two-tone effect harmonizes seamlessly with your home’s wood tones. Two clever storage drawers provide hidden space for remotes, magazines, or books. With its dimensions of 48L” X 22W” X 17”H, this beauty will elevate any living space.
I knew this was a quality piece when I saw it on Facebook marketplace. When I picked it up, the legs were loose (easy fix), a drawer knob was missing (easy to replace), there were usual scratches on the top but the corners were chewed on by a puppy. It was a bit more than I saw at first look at the posted photo but it is solid maple and worth picking up.
Now it looks like a simple refresh but this is not what happened. There were a ton of pivots with plan B, C and D happening. Let me share all these pivots. And bear with me as this is a long tutorial sharing my pivots and lessons learned.
Alternately you can skip to the bottom to see the beautiful results after all these steps.
Apply a nice thicker layer and allow to start its magic.
You will know it is working when it starts to bubble as you can see in photo above left. To remove this product I use a metal scraper. This one we have had for probably 25 years.
The stripper is now ready to remove and this type of factory finish took a couple hours to lift. Using the metal scraper it was removed and discarded safely in the trash. The top was neutralized with water and the base scrubbed at the same time.
All was dried with a towel and left to dry naturally before the next step.
This is the puppy chewed damage on the 2 corners of the table.
Did you know you can steam iron wood scratches? I used a hot steam iron over a damp sock to swell and raise the scratched or dented wood fibers.
The big long scratch was gone in about a minute.
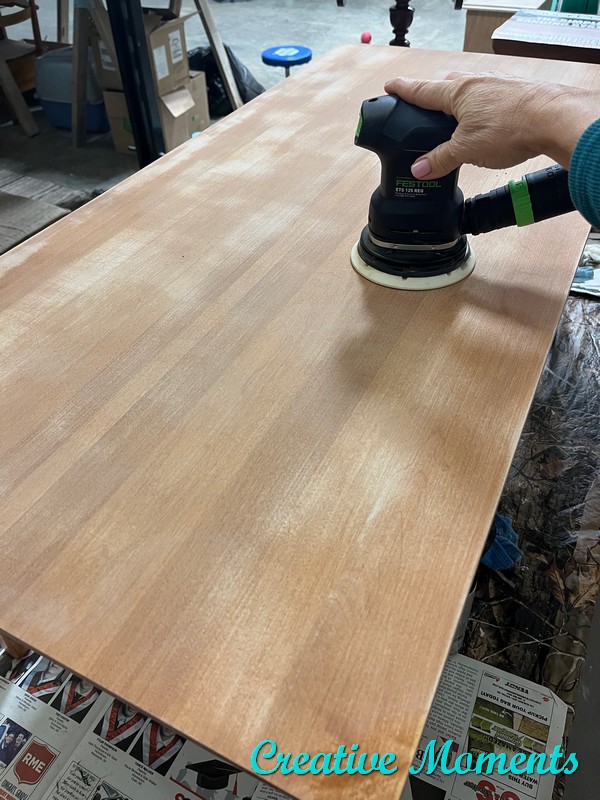
watch in real time video as I sand the scratch away
The beautiful maple grain on the top. In the background is a
tall pine dresser getting its gray makeover.
Finally the top is bare maple and looks lovely.
This is the first coat on. Three coats were applied as per can instructions. The table was left for about a week to dry as I got busy with life.
The light walnut color does not pair was well with the original maple base so I tried a warm white paint on the base tested on the drawer. No that is too stark so it was washed off.
Another option was to tone done the orange tint of the base using walnut
No Pain Gel Stain. I apply with a blue shop towel and wipe off leaving just warmer tone.
I found 2 new wooden knobs in my stash. Seeing they are unfinished wood I wanted the stain to not absorb really dark so tried the newly released
pre stain wood conditioner . The left has a coat applied while the right is still bare wood. They were then stained the walnut
No Pain Gel Stain as well.
Hoping to marry the top and bottom, I applied a thin coat on the top as well.
Which looked beautiful when both surfaces were wet. However after it dried the base still showed the orange as you can see in below photo.
This turned out to be a lovely worn finish but against the top it just did not look harmonious.
So it was all washed off back to the gel stained color. UGH
Pivoting yet again, The entire coffee table base was given yet another coat of walnut
No Pain Gel Stain
The top was done in espresso
Gel Stain. This gave the top a much darker color - above going on. And it looked great as a complimentary tone on tone match.
This is where I should have stopped as yet again there was another glitch in the plan that will follow.
Seeing it would be sold and not everyone takes care of their wood using coasters and mats I wanted to add more durability, I chose a
wipe on oil top coat. The first coat when dry, it was ok but not amazing so I gave it a light sand and applied a second coat with a new applicator pad. The next day when I looked I was devastated it had areas with wee bubbles, uneven transparency and overall splotchy.
It seems there may have been a issue with the different products. Now to pivot and fix this.
I wiped the dust off, then wiped with as they suggested may soften the wipe on poly then again repeated another sanding with the
Gator 220 sanding sponge (R). Followed by another damp wipe but this did not make any changes.
Both myself and the company said if this did not work it was back to the start.
Ready for the next steps after a damp wipe.
pre stain wood conditioner was applied with a soft cloth. Allow it to absorb, wipe excess off and after 30 minutes it is time to stain.
here is the walnut coat on
While it was still wet I applied a coat of
espresso Gel Stain to deepen the color like the first round. Allow to dry 72 hours.
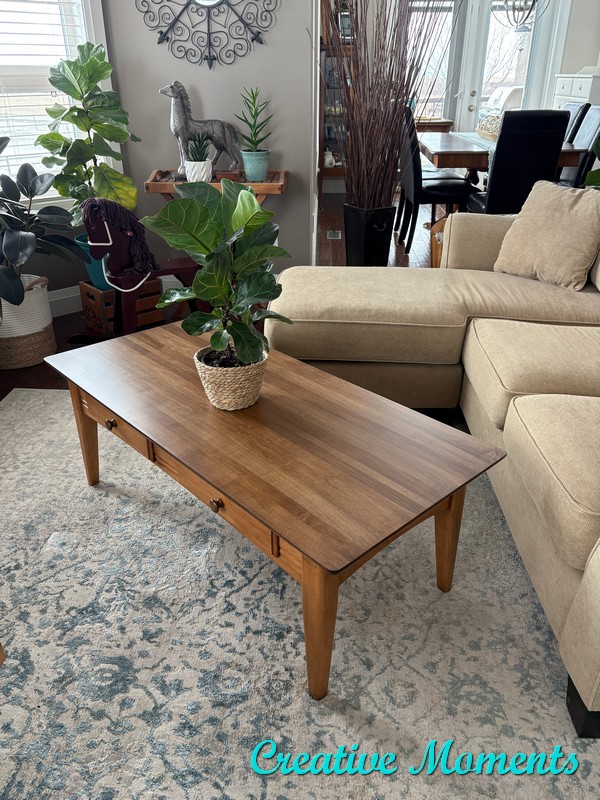
Second coat on and left to dry, it is done!! FINALLY!!!
And it looks beautiful.
And sold in just a few days after listing.
Links to the Dixie Belle products are for your convenience. My affiliation with this company does not increase prices on your end, your purchases via my links do however provide a small subsidy which allows me to keep providing these free tutorials. Thank you!
Big thanks to ????? for sponsoring products used in this post.
Please note the Amazon affiliate links are for your convenience to see the products I used as well. Ordering via the link may get me a small commission but does not affect your pricing. Thank you if you do choose to order them.
FEATURED ON
Shared on these fun link up parties


You have a talent for this! Lovely results!
ReplyDeleteThank you Jeanne, you are most kind, this one was quite a challenge but I did persevere :)
DeleteStill trying to figure out this system for comments!
Delete