A good customer wanted their laminated desk painted to update it to a classic black from a cherry wood color. Yes you can paint laminate you just need to add a few extra steps. Let me show you how.
This is the customers desk together above and how it was brought to me to paint below.
First order of business was to clean it well with a spray cleaner and damp cloth seeing it is veneer over chipboard. Scrubbing in my usual way would not work for chipboard as it swells with water on it.
Next step is fill all areas were the veneer has chipped off the chipb
oard with DAP
wood pro-x filler. Let dry and sand smooth.
Another challenge of laminate/veneer is the supper shiny slick surface. Paint needs something to stick to or will peel off. All the surfaces were hand sanded then coated with
Fusion Mineral Paint's ultra grip. Apply a THIN coat over all the areas. This top was done too thick (see the streaky brush marks?) so was wiped off while still wet and applied thinly.
I did not have enough Fusion coal black on hand so grabbed a new jar of another paint brand and rolled on using a microfiber roller then laid off with a thick brush.
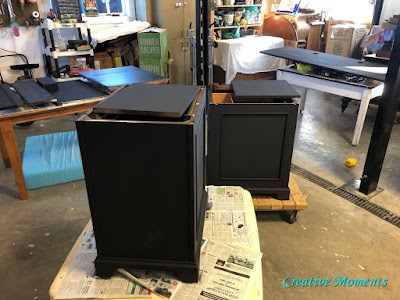
All the pieces were given a coat; some pieces had two sides so flipped and painted once one side was dry.
A second coat was brushed on, above you can see the second coat going on on the right hand side.
It was like a little factory with all the pieces and sides.
Everything was left to dry.
The next day a clear flat poly and some of the black paint were mixed and applied with a damp sponge to all the surfaces.
A light sanding and it was complete HOWEVER once lightly sanded tine white spots appeared. I think it may have been the paint, brush or sponge that left them but this would not do. Using my razor I went over all the surfaces zipping any tiny spots off.

Time to pull out the
Fusion coal black paint I had on hand seeing there is a good black base. Everything was painted another coat of coal black.
But not all blacks are the same black. Coal black is on the right. A deep rich black. And it has a built in top coat which is a bonus when you have already applied 2 paint coats and a clear sealing coat. This is the icing on the cake .. or desk as it is :)
 |
Everything is compete and once dry the hardware was put back on. |
Here are all the desk pieces painted and ready to be put back together once back in the owners home.
And it was all picked up in pieces to return home to reassemble with photo promised.
And a few months later the customer sent the promised photos. In the meantime it has been in storage as they sold their house and bought new.

Once they moved into the new house they set it all back up and here it is.

You can just see the edge of a
vintage tea cart to the right below. It was refinished here at Creative Moments as well.


That black is gorgeous! You did a great job on this project. I'm sure your customer is thrilled with the outcome. Thanks for sharing with us this week. #HomeMattersParty
ReplyDeleteThank you Donna, they were indeed very pleased with the new "look" for their new house ;)
Delete