This sweet wooden tote/caddy looks fabulous in shades of green with vintage floral designs don't you think?
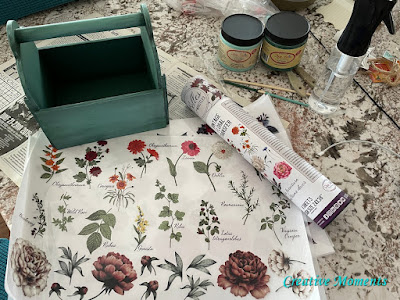
I picked this beer sponsored condiment caddy up at a local thrift store, so much potential to restyle it.
It was scrubbed up well and dried ready to restyle.
After much thought I chose Dixie Belle Paint in palmetto for the base coat inside and out. Links to the Dixie Belle products are for your convenience. My affiliation with this paint company does not increase prices on your end, your purchases via my links do however provide a small subsidy which allows me to keep providing these tutorials. Thank you!
After the palmetto coat dried it was time for Dixie Belle Paint color called the gulf.

However this is where the issues began because I did not use Dixie Belle Slick Stick on the super shiny smooth surface. This type of surface NEEDS this step even with the original chalk mineral type paint.
See where the paint reactivates the base coat and the shiny surface releases it causing bare patches. I tried brushing over the bare areas and it only makes it worse.
So I wiped it back to the smooth surface and repainted the area.
I love these two colors blended, you?
Cutting them apart makes it easier to come up with a layout for them around your project.
Once you find the spot, remove the backing and rub in place with the provided stick. This particular transfer along with the cherry blossom transfer were from another manufacturer. The transfer has a sticky halo that had a learning curve but prior to solving it I found the lack of slick stick again caused issues with the transfers that pulled the paint off as well. UGH!
Some areas were worse then others but so frustrating after all the lovely blending work so again BE SURE TO USE SLICK STICK on any shiny smooth surface to save you all this extra work.
Again the layers of paint were added after the areas were sanded smooth to correct this issue.
And the solution for this transfer's sticky halo is to burnish it with a fine grit sanding pad. This also smooths the paint as well. The sanding paper was used to distress the edges to give a rustic farmhouse feel.
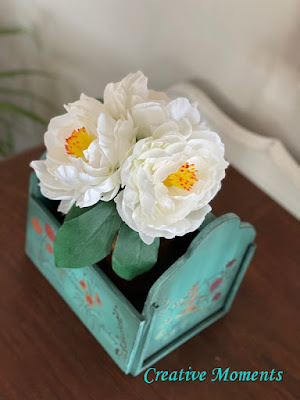
All sides have pretty flowers and the interior is the dark green.
So many uses for this adorable tote; brush/pencil/crayon organizer, mail catcher, beverage server, makeup or utensil organizer,
flower vase holder
condiment caddy, planter, or whatever needs corralling in a beautiful tote.
as always a video tour of this cutie
Links to the Dixie Belle products are for your convenience. My affiliation with this company does not increase prices on your end, your purchases via my links do however provide a small subsidy which allows me to keep providing these free tutorials. Thank you!
FEATURED AT
Shared up at these fun parties


I love this little tot and I have all of these products!! I hope you don't mind that I copy you. My booth needs more fun things like this. Thank you for your inspiration.
ReplyDeleteThanks Cheryl, by all means create away, I am very humbled you want to replicate my creation :)
DeleteThis is so cute. This would be a great little tote for your garden tools and supplies. Thank you for sharing!
ReplyDeleteAgreed, great ideas for sure, thanks
DeleteBeautiful transformation! I love the color and the flower pattern. I would love to see you share your wonderful ideas at Home Matters Link Party and You're The Star Blog Hop too. Happy Easter!
ReplyDeleteMel
Decor Craft Design
Thanks Mel, I did go to these parties this week and hope to remember in the future too :)
DeleteGreat Articles
ReplyDeleteThis came out great. I love the colors you used. So pretty & great transformation. XO- MaryJo
ReplyDeleteThank you MaryJo!!
DeletePinned that floral tote-caddy. Just love the colors and design.
ReplyDeleteThank you kindly Nancy!!
DeleteI fancy one of a kind items myself! This post is one of my features for this weeks Senior Salon Pit Stop. Thank you for sharing with us. Melynda @scratchmadefood!
ReplyDeleteThank you Melynda, I appreciate your thoughtfulness and kind words
DeleteThat's so sweet! Thanks for joining in on Home Matters Linky Party! I will be featuring your post this week! #HomeMattersParty xx
ReplyDeleteThank you so much, that means allot :)
Delete