FEATURED Blog Post on Hometalk

Classic Black Antique China Cabinet

  Does anyone have china dishes anymore? Is it still a thing? Years ago, when I got married, it was all about picking your china pattern and creating a gift registry for the pieces you needed. My pattern was called Chelsea by Royal Doulton, and it was a soft muted floral.

Walnut & White Dining Table


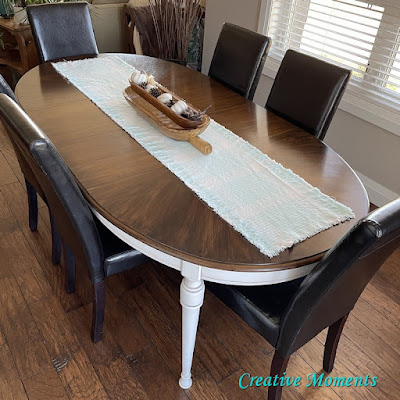
FINALLY I reloved my own dining table!! Dark walnut stained top and an aged warm white base; my favorite color combo.


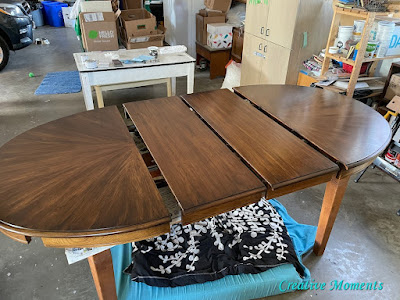
This is our dining table awaiting its update while I refinish so many others.


Above it has 1 of the 2 leaves in, this is our usual size configuration. The solid wood Sklar Peppler dining table is part of a dining room set with 6 chairs and a hutch.


It also had a matching sideboard/sofa table too that I have previously reloved in a deep navy.


Subscribe to these Blog Tutorials ~ Visit my Etsy Store
Follow me on Facebook Follow me on Pinterest 
Follow me on Instagram ~ Follow me on Hometalk


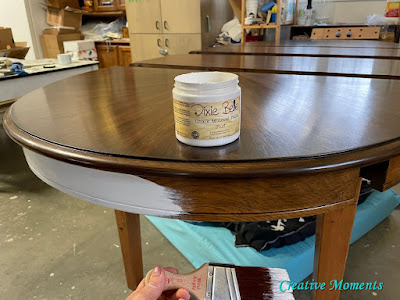
I applied a coat of walnut Dixie Belle No Pain Gel Stain to one of the leaves while I was creating this walnut and charcoal dining table for my sister . The dark stain is much better fit for our home compared to the lighter original stain.


Clean the table well as first step. The gel stain can be applied over an existing finish if it is in excellent condition.  It does require a light scuff sand first. Then wipe away any sanding dust.


I like to apply the Gel Stain with a blue lint free shop towel.


This is the first coat applied.


After 4 hours lightly sand the surface again with a Dixie Belle sanding sponge and apply a second coat.


I applied 3 coats in total with a light sanding after each.


To seal the gel stain I applied 2 coats of Dixie Belle satin clear coat one with a damp  Dixie Belle applicator sponge and the second using Dixie Belle scarlet brush


I get OCD about streaking so for the first time I tried using a mircofiber roller to apply 2 coats of super durable Dixie Belle Gator Hide. I was very happy with the results.

The base was painted in fluff Dixie Belle Paint applied with my favorite 2" angled Dixie Belle synthetic brush.


The last of the oak showing as the paint goes on. Note it is sitting on my work table, those are not the legs :)


These are the legs which were taken off after cleaning and painted on all sides.


The contrast is looking great after 2 coats of fluff.


I used a sanding sponge to sand the paint smooth and lightly distress the edges for a worn aged feel.


The paint was sealed with clear Dixie Belle's best dang wax applied with my dedicated clear wax Dixie Belle best dang brush. This big brush makes application a breeze.

Then to add further age, brown Dixie Belle's best dang wax was added to edges, nooks and crannies with a well used Dixie Belle premium chip brush. See the difference the brown wax makes above?


dark vs clear wax video for a better look and below shows the brown wax going on the legs too


Subscribe to these Blog Tutorials ~ Visit my Etsy Store
Follow me on Facebook Follow me on Pinterest 
Follow me on Instagram ~ Follow me on Hometalk


both leaves in


Links to the Dixie Belle products are for your convenience. My affiliation with this company does not increase prices on your end, your purchases via my links do however provide a small subsidy which allows me to keep providing these free tutorials. Thank you!

FEATURED ON


Shared up at these fun parties

Comments