Does anyone have china dishes anymore? Is it still a thing? Years ago, when I got married, it was all about picking your china pattern and creating a gift registry for the pieces you needed. My pattern was called Chelsea by Royal Doulton, and it was a soft muted floral.
However all my china is stored in my upper cupboard, not on display at all.
I do have this smaller cabinet I have to display my grandmothers' pretty dishes I inherited.
This is a very detailed tutorial with a lot of steps required to restore this piece. Please note the Amazon affiliate links and the Dixie Belle products are for your convenience. My affiliation with these companies does not increase prices on your end, your purchases if you chose to, via my links do however provide a small subsidy which allows me to keep providing these free tutorials. Thank you!
The cabinet top was laid out with doors open to air out. This antique beauty is Canadian made by Middlesex Furniture. These paper, handwritten labels as affixed to both the top and bottom pieces perfectly still after all these years.
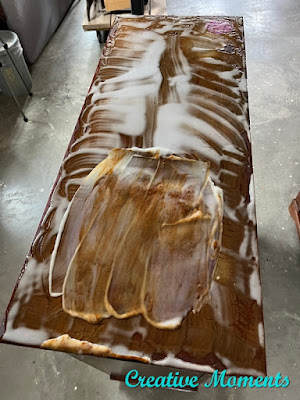
It was then brought in and the top had EZ Strip Paint & Varnish stripper applied (L) then scraped off after the finish lifted. (R) The top then was neutralized with a clean water wipe and left to dry.
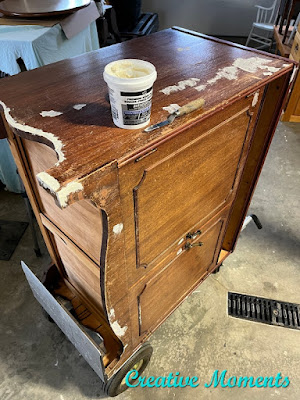
The lifting veneer along the edge was glued securely back down using Titebond cold press glue then a flat piece of wood set on plastic and clamped firmly together. You can use regular wood glue but I have the specialty veneer version for many of my projects. This was left to dry well.
The cabinet base was up next. The top of it is in rough shape.
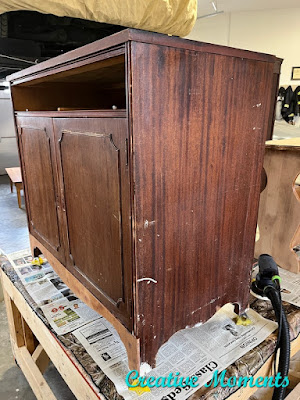
The top was scrubbed with water to neutralize the stripper then the entire base was scrubbed inside and out to remove years of grime.
Pristine clean, which is the same as white lightning cleaner was mixed in a bucket of warm water to scrub the piece as well as the premixed bottle was sprayed on all surfaces to really get the surfaces clean. Look at the water color coming off the back. It was then rinsed well with clean water.
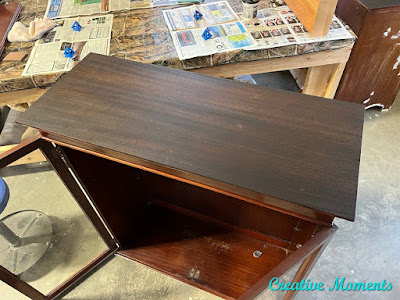
The top was wiped with a towel and left to dry. See the wee stripe of finish that was missed? No worries, It will get removed with the sanding step.
The bottom in the base was warped but after being wet from cleaning I set a gallon paint can on a piece of wood to flatten the thin wood as it dried.
Remember to go slow and do not press on the sander when working with veneer as it is easy to burn thru the thin wood layer.
The base needed many areas repaired. Seeing this will be painted I chose DAP premium wood filler which is white rather than wood toned but sands smoother.
I apply wood filler with an offset metal spatula because it lays it out smooth and fits in all areas of a piece.
Let sit for about 15 minutes then with a clean shop towel wipe away the excess and let it dry 9+ hours between coats.
This was repeated on the cabinet top as well. I did 2 coats on both surfaces in total.
The door catches were removed from the cabinet top (L) which is important as you can see what gets stuck under them over the years. (R)
It seems there was something causing a lot of scratches on the bottom shelf that will need to be sanded smooth.
Sunlight has caused stain fading over the years too.


The one door was very sticky when closing so I spent time sanding the underside of the door frame till it closed without any issues, The then inside and outside (NOT the top as it had drying stain on it) was cleaned well with the spray on cleaner and a rag followed up with a clean damp rag.
The wood filled areas were sanded smooth with my orbital sander then all dust wiped away.
The lower edge of the cabinet base required sanding right down to the wood as it was very chippy and needing a nice smooth surface. Remember what you see on a surface prior to painting will show and sometimes even show more with paint so take your time prepping the surfaces to be uber smooth.
PRO TIP - less is more with this paint; thin layers dry fast as you see along the top edge.
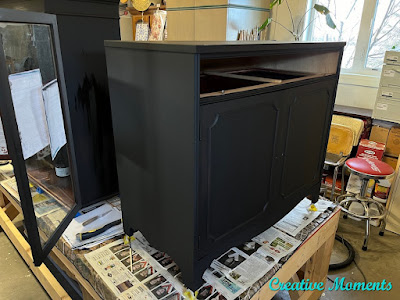
The base painted 1 coat - note the paint pyramids used to keep the base off the work bench for ease of painting.
The cabinet top is painted (L) as are the glass doors. Paper slid along the glass can save paint getting on the glass itself but must not be left on as paint dries or it can stick causing more issues.
I find the easiest way is to paint around the edges and if there is some paint on the glass use a glass razor scraper or this small carbide scraper I have in my workshop.
The 2 removable shelves were painted on both sides. Paint pyramids are the perfect tool for doing this as it keeps them off surfaces where they may stick.
The pyramids are under the cabinet top too allowing for nice crisp painted edges. There can be areas that show up after the first coat like this corner edge that was missed in the prep stage. I used black Dixie Belle mud to wood fill the spot, sand and touch up with the black paint when dry.
I wanted to add a bit color drama in the drawer. I choose moody mums rice decoupage paper. Do you like?
It was cut to drawer bottom size.
Then ironed to remove the fold creases. I cheated doing this on my granite island :)
The paint along the drawer front edge was tidied up with the small carbide scraper. (L) then adhesive brushed on the drawer bottom. I used satin clear coat as adhesive. It takes a bit to get it aligned and on most drawers they are never actually square so do the best you can.
Once where you want it, add more clear coat to the top of the paper brushing out the bubbles towards the edges.
The original hardware was cleaned and put back on.
The base can be used as a stand alone sideboard.
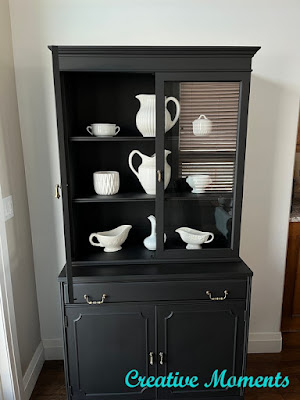
The hardware is classic along with the narrow wood detailing.
Love this stained top.
The top was set in place and the shelves put back in.
I am loving this paper in the drawer
There were a few touch ups, this small Artist Brush is perfect for touch ups.
Glass is so hard to photograph thru
doors open help give a better view of this black beauty.
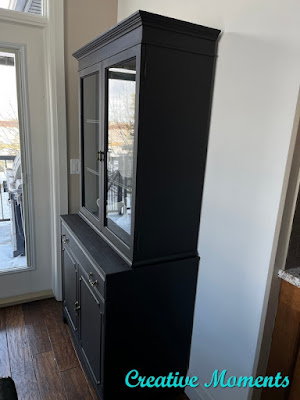
This cabinet is a great size, not to big and not to small yet has loads of storage both visible and hidden.
It sold in a few hours, below the buyer shares a photo of the cabinet in her home. Thanks Aimee!
Please note the Amazon affiliate links and the Dixie Belle products are for your convenience. My affiliation with these companies does not increase prices on your end, your purchases via my links do however provide a small subsidy which allows me to keep providing these free tutorials. Thank you!
FEATURED ON
Hometalk
Dec 9, 2024
Shared on these fun link up parties
















Looks like it took a lot of time and patience but sure transformed the tired piece of furniture into a beauty that will be passed on to another generation. Great work.
ReplyDeleteThank you, it sure was a popular piece due to size and color I think :)
DeleteI love that you made the inside of the drawer pretty as well, visiting you from Senior Salon Pit Stop. I'm starting my own link party Tuesday, Jan 14 called Wednesdays in the Studio. I'd love to have you join! https://studio27byjenniferadams.blogspot.com/
ReplyDeleteThank you Jennifer, I appreciate your kind words and will. e sure to stop by your party.
DeleteThanks for adding this entry to my link party, featuring you in this week's edition!
DeleteThank you Jennifer, I am honored
Delete