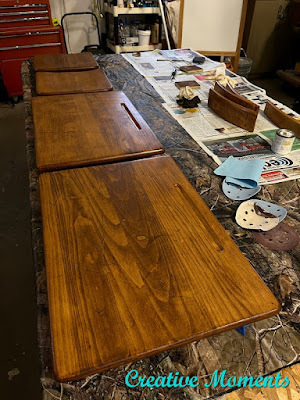
Revitalize those old wooden school desk parts—dinged, damaged, and etched with names—with some creativity and care. After a good sanding and a fresh coat of stain and finishing oil, they’re ready to be reassembled on their metal frames. Now, they can once again stand proud as Grandma's cherished school desks, brimming with history and charm.
The pieces piled up at the customers house when she requested the refinish. She took them off the metal frames to make easy to transport and work on.
The desk tops seemed to get the worst wear and tear. This deep gouge needs some attention.
The carved in names will need allot more attention.
And left it to do its magic. After some time, I scraped it off and neutralized with water. When it was dry I power sanded it with my orbital Festool sander.to bare wood as shown below.

To address the gouges I applied DAP wood pro with my offset spatula in all the gouges and dings.
Once dried the surfaces were power sanded with my orbital Festool sander. Many hours of sanding went into the restoration.
To get into the narrow area along the front edge of the desk top (anyone know why it is there even?) I folded used sand paper over my metal offset spatula and hand sanded the areas smooth. Anothr handy tool I used for this area to make nice clean edges after the initial folded sandpaper sanding was this handy Sander Card
TIP - keep your used sandpaper pieces as they are super handy for hand sanding
Similarly I used my finger as the backing for the folded sandpaper in the pencil ledge on the top side.
Above shows the desk seat surfaces being sanded. Right is almost complete while left is original.
The seat back sections were sanded on all 6 sides. Above I am almost done the sanding steps.
On my large new work table I am able to spread all the pieces out and do the final power and hand sanding to all the pieces. They are set on paint pyramids which will make the staining easier.
I started with golden pine color which is very similar to the original color of school desks. It also absorbs into the wood fibers and seals them so the darker color I plan to use will not absorb so dark.
2 coats of this color went on about 12 hours apart with a light sponge sand after each coat dried.
The 3rd coat was my favorite cappuccino color. See how rich it is next to the golden pine?
All pieces having the darker coat added and left to dry. This was the color the customer wanted for her new school desks at Grandma's house.
After about 3 days of drying they were ready to head back to their home to be reassembled.
Please note the Amazon affiliate links are for your convenience to see the products I used. Ordering via the link will get me a small commission but does not affect your pricing. Thank you if you do choose to order via them.
Thanks to Fusion Mineral Paint for sponsoring the stain finishing oil. It is hands down my favorite finish ever.
Featured On
Shared at these link up parties


Thanks for sharing with us, I'm featuring you this week when the next to Grandma's house we go party starts! Happy Turkey Day!
ReplyDeleteHow exciting, thank you!! Happy turkey day down there to you and yours
DeleteThanks for sharing with us, I'm featuring you this week when the next to Grandma's house we go party starts! Happy Turkey Day!
ReplyDeleteBoy, lots of elbow grease went into this, but, looks lovely with that darker color! Well done and have a blessed Thanksgiving!
ReplyDeleteThank you :) It was worth it for the customer to get her "grandma" school all set up . Happy thanksgiving!
Delete