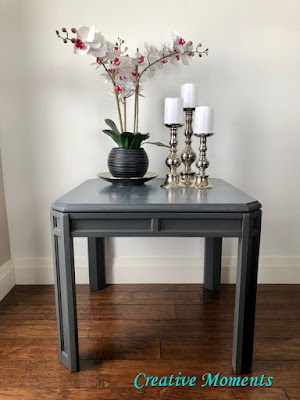
If you are a grey fan I think you are going to like this makeover.
The top has seen wear and tear over the years but the inlaid oak top will be so lovely refinished.

Hopefully these two videos help give a better visual of how I used the
carbide scraper.
The old finish scraped off nicely and in about an hour I had the top stripped without using chemicals.
It was then power sanded using my
Dewalt
orbital sander to remove any bits left and give the top a smooth surface.
Following the can directions, the reactive stain was applied to the table top.
Above is one coat and below is two coats.
Allow the top to dry well.
Watch the video for my demo
See how it catches in the grain?
Above is the first coat and below is a second coat of the
white maintenance oil wiped on. Be sure to leave these coats dry a minimum of 72 or more hours.
For the table base,
Fusion
Mineral Paint in ash was brushed on using their 2" angled brush.
It complimented the top perfectly.

To create the perfect finish.
The base was painted 2 coats of ash them lightly sanded and the table is complete.

One of m daughters thought it would be funny to stage the table with toilet paper as the bonus gift with purchase seeing toilet paper is such a sought after commodity during the current Covid pandemic.
I have also linked items I used on my projects via my Amazon affiliate for your convenience. Rest assured there is no pressure to purchase nor is there any increase in price using my links. It is only meant to share what products I find useful.
Shared up at
Farmhouse Friday
All About Home


Comments
Post a Comment