Are you a fan of this sideboard/buffet update?
I LOVE antique pieces especially sideboards or buffet; the names seem interchangeable until I read this
It's All About the Legs
It's safe to use the terms sideboard, buffet, and credenza interchangeably when shopping. The subtle differences between them have to do with the legs. A sideboard has short, stubby legs and may include a hutch for display. A buffet has higher legs and no hutch. A credenza has low or no legs, and will typically have sliding cabinet doors.
When I saw this buffet on a bidding site I had to win it.
Of course it needed a few repairs after years of service. On the back part of the buffet (not positive of the correct name, if you know please message me) the applique was missing broke off pieces. I made new pieces using
PC Lumber epoxy putty then carving with a pottery tool.
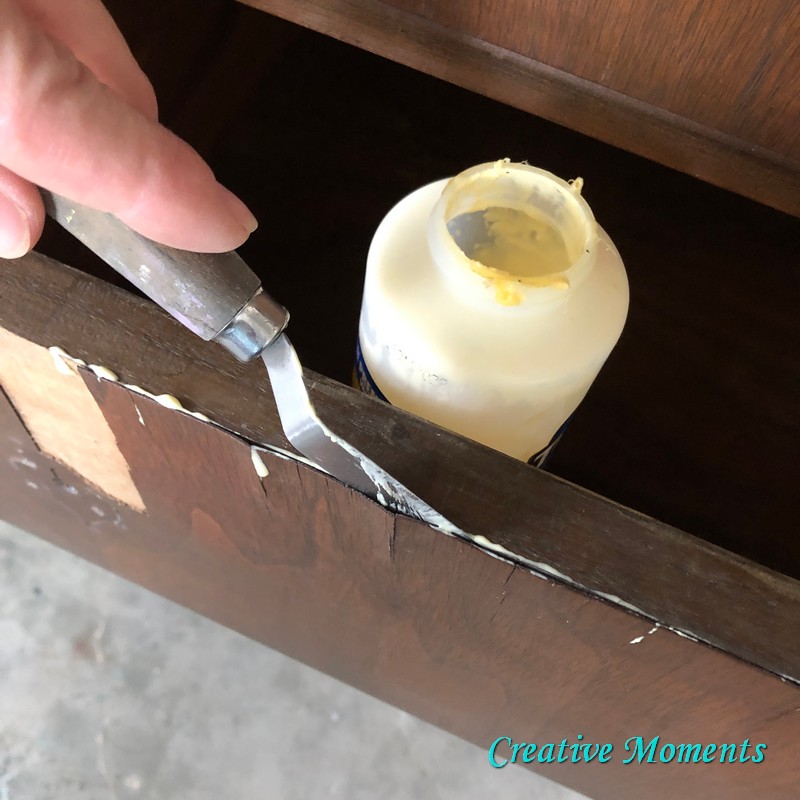
Luckily the missing piece of veneer was in the drawer.
Using my wood glue and a offset metal spatula I glued it back on as well as getting the lifted edges glued too. Then all was clamped flat and flush with a board and clamps and left to dry.

This is a very important step as over the years a piece collects lots of grime and this one seems to have come from a smoking home. You will see dark tobacco colored water running off as you scrub. Yucky!
Once it is scrubbed clean, I rinse with clean water from a hose then dry the wood surfaces with a towel.
The board used to keep all the veneer flat was removed, and wee missing areas of veneer were filled with
DAP
wood pro-x and left to dry. Using my new 3/4"
carbide
scraper from Richard tools I was able to smooth the edges of the veneer flush.
Then as a finishing step all was lightly hand sanded smooth.
The top has some water rings. This is a problem on many pieces. And there are allot of suggestions out there to remove it. I did try paint stripper then mineral spirits, no luck with either.
Next I hand sanded the top with a medium grit
SurfPrep rad
pad but it needed a bit more. My orbital sander and 120 then 220 grit were used to get the top as smooth as possible. But the water marks still remained faintly.
The plan for the top is to
hemp oil it. Hemp oil is the perfect hydrating dealer for these antique pieces. See how it brings out the gorgeous grain and deepens the natural color? It also made the water marks disappear!!
A little video demo to show you how easy it is to apply!
I applied 3 coats of hemp oil allowing it to dry overnight between coats and will add a couple more in the future as there is still more oil needed.

This was my first time trying this product and I was gobsmacked. It was so easy to apply (I used a
Dixie Belle's oval brush I designated as a wax brush) and made such a big difference. Check out before and after above. I loved it so much I did the entire inside of the buffet including the underside of the top, drawer runners and all sides of the drawer area.
I look forward to trying the orange grove scent for my next tub. Suzanne's garden scent is very floral leaning towards rose mainly.
The color I chose for the buffet body is
Dixie
Belle in fluff.
The bottom drawer was the test subject ; perfect!
So onto the entire base.
Goodbye to the last of the original stain.
The original hardware was so lovely but it did need a polish.
Then to bring out the great applique details and add age back to the piece I used a chip brush to add
Dixie
Belle's best dang wax in brown.
I love how it brings out the detailing.
You can see the difference from just fluff on left door and added brown wax on right and center drawers.
The hardware and top back plate was added back on and it is complete.


This one is a keeper, I did it for our home.


However I did end up selling it to a lovely lady for her living room entertainment center
Links to
Dixie Belle products are for your convenience. My affiliation with this fantastic paint company does not increase prices on your end, your purchases via my links does however provide a small subsidy which allows me to keep providing these tutorials. Thank you!
Shared at these link up parties


Comments
Post a Comment