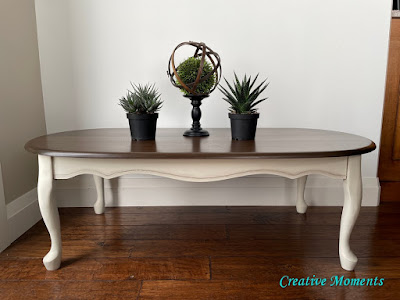
This sweet coffee table went thru not 1 but 2 makeovers, this is the final finish. Do you prefer it or the first makeover below?
The first makeover had a coastal beachy feel but the buyer wanted rich walnut top so who am I to argue :) I did like the fresh airy feel though.
Especially compared to the reddish original finish.
Although the seller insisted it was solid wood I knew better as I had worked on many over the years. It is wood veneer though which makes it sand-able and this was what I did.
Using my power orbital sander I spent a couple hours going thru the sanding grits to get the dings and scratches smoothed out and back to bare wood.
Flipping it over to paint makes it easier especially if the top is to be stained. I like to do the under edges of the table and apron too for a professional finish. To be sure the reddish stain does not bleed thru the solid wood legs and table apron I brushed on 2 coats of
Dixie Belle BOSS.
I used the tinted white version to also help save on paint as it acts like a primer coat of white color. BOSS blocks odor, staining and seals the wood; perfect.
Flip the table back over and you can see a huge transformation already.
Looks good right?
Now to the top, the red stain seems to be faintly showing.
This was the first makeover finish that was posted on my
Facebook page for sale.
A potential buyer asked if I could do the top in solid walnut, why sure I can :)
The buyer was thrilled with the second makeover.
Links to Dixie Belle products are for your convenience. My affiliation with this fantastic paint company does not increase prices on your end, your purchases via my links does however provide a small subsidy which allows me to keep providing these tutorials. Thank you!
Shared up at these great link up parties


Comments
Post a Comment