Antiques are a favorite of mine, they hold so many memories and stories, if only they could talk. I bet this dining table served many family meals (especially when it had its leaves to seat so many more), held many coffee cups and heard so many conversations!
My neighbor was moving and offered me this antique table that was her husbands grandmothers. Of course I would take it even though2 leaves were lost over the years. Those gorgeous screw in carved chubby legs and detailed sides were amazing.
I cannot say no to carved solid old wood pieces.
The table also had a smoked glass with polished edges cut to fit the square table top. The owner said it was $400 retail to replace but it I didn't want he was tossing. Of course I will keep it with the table.
The one quirky feature was the top was offset on one side. Seeing the carving pattern lined up I feel like the leaves may have been custom made to fit this offset?? I could cut it flush but seeing the glass top fits over it we will leave for now.
And 2 of the leg brackets had been moved over after screws looked to have been pulled out a few times. I put my thinking cap on for this fix and will share my solution later on.
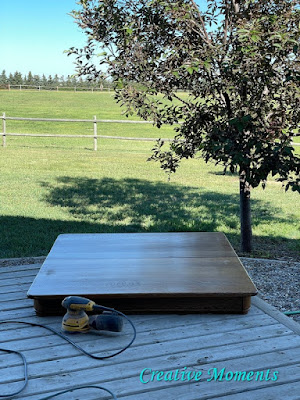
I hauled the top outside to power sand down to bare wood and remove the damaged areas and give a fresh new look.
Trying to fill the stripped screw holes did not seem the answer so I had my handyman drill new holes with a counter sink top. This will allow the new screws to affix into new solid wood areas.
I also applied wood glue to the table and underside of the bracket for additional strength and support for the thick legs.
And new screws drilled in in the original spot making all the legs the same distance from all edges.
The legs were screwed in place and voila! The base underside, apron and legs were cleaned well with a rag in a bucket of warm water and
Fusion TSP
Alternative. This gets rid of years of gunk and grime. The top was wiped as well.
Here is the table top power sanded smooth.
The last sanding step was with this fabulous jumbo
sanding sponge from Richard Tools. It makes hand sanding large flat surfaces a breeze. The angled sides make it also get into smaller crevices too.
Another quick wipe with a damp rag to remove all sanding dust and allowed to dry.
Now to hydrate and bring out the grain of this old wood with
Fusion Hemp Oil
I LOVE hemp oil, it is easy to apply and instantly shows results.
I like to apply with a dedicated hemp oil
Fusion Chip Brush. Brush on, allow to absorb for about 10 minutes and wipe off excess with a blue shop towel.
Allow to dry over night and repeat until the oil no longer absorbs and the wood is rehydrated and looking lovely.
I applied 3 coats.
Harley my cane corso shop dog loves to be part of the photos ;)
You can wipe the wooden base too with the hemp oiled rag to bring out some shine.
The table now resides in my eldest daughters townhouse ready to serve for years to come.


Comments
Post a Comment