
This is the 3rd refinished piece from the bedroom set I picked up awhile back; the biggest piece was left for last. This 7 drawer pine dresser is not longer vibing the 80's but rather a soft 2021 grey-tee ;)
Who had a set like this from the 80's? Solid pine with a tall dresser, long dresser with a huge hutch like mirror and nightstands usually with a water bed frame that had a headboard with mirror and shelves too.
The big old mirror was great to display trinkets, perfumes etc but no longer the fashion with a more minimalistic mirrorless looks in favor. I am planning to make the mirror into a rustic shelf.
All the pieces had scratched on them but this dresser seemed to have been attacked on one side.
WOW ... I did ask the precious owner if he had a tiger caged in the room with it :)

This is easily fixed as well as filling the detailing groove around the top that I find nothing but a dust collector with Dixie Belle mud applied with their mud spatula. Over fill slightly and allow to dry thoroughly.
Using my orbital sander I smoothed the filled areas smooth.
One of the drawers had a corner missing but it too is easily fixed.
I love this 2 part wood filler called PC Lumber. Cut off the amount you need with an exacto knife and wearing gloves knead it together.
Press it firmly into the area needed and mold it to the shape you want. I like to use an offset spatula to make sure the edges and back are super smooth and flush. This mixture will harden in short order so don't waste time. When it is dry sand smooth if needed.
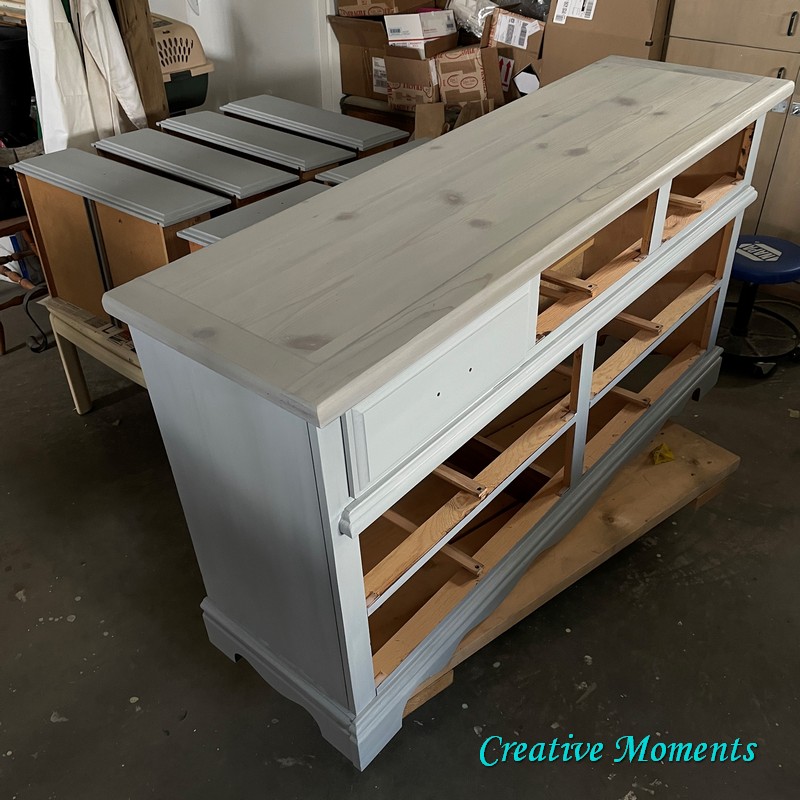
While I was sanding this dining table top outside I rolled the dresser out to be power sanded as well. I started with the top with 80 grit sandpaper to remove that old stain, then to 120 grit to smooth all dings and gouges and get to bare pine.
I also decided to take the drawer fronts down to bare wood as well thinking I will stain these areas. Notice that the original hardware silhouette remains even after lots of sanding.
I chose
Dixie
Belle No Pain Gel Stain in the color weathered gray. I like to apply with a blue shop towel after stirring well, using a clean area of the towel the excess is wiped off.
I could still see the hardware shape even when dry, this is not going to work as I am changing the hardware to new sleek modern pulls.
The top however looks lovely with the wood grain showing thru.

I decided to paint over the stained fronts with the body color; manatee gray from Dixie
Belle Paint. I do think it looks better, you?
The entire base was painted a coat of this soft medium gray.
However once a coat of paint goes on you will find any places you have missed that needed filling. No worries, bring out the Dixie Belle mud again and fill them. When dry lightly sand and the second coat of manatee gray will cover it flawlessly.
Using the Dixie Belle's oval brush I used to apply the manatee gray color, mist the tips and blend if needed if areas are too dark. Repeat with both until you achieve the perfect blending of both colors.
To warm the cool gray tones and add to the bits of wood showing thru the distressing brown Dixie
Belle's best dang wax was brushed around the edges and in the nooks and crannies. It is hard to tell but I was trying to show drawer fronts with (bottom) and without (top) brown wax above.
They totally update the drawers!
p. The drawer runners were waxed to make them slide effortlessly, drawers put in and this dresser is no longer stuck in the 80's but now grey-tee :)
video tour of this beauty
Links to Dixie Belle products are for your convenience. My affiliation with this fantastic paint company does not increase prices on your end, your purchases via my links does however provide a small subsidy which allows me to keep providing these tutorials. Thank you!
FEATURED ON
Shared at these great link up parties


Beautiful makeover!
ReplyDeleteThank you so very much :)
DeleteAnother stunning makeover! Thanks for sharing all of your creative projects. #HomeMattersParty
ReplyDeleteThank you so much for your kind words and hosting ;)
DeleteWhat did you do to the top piece? Loved the bottom.
ReplyDeleteAh it was given away, they are not sellable where I am :) thanks for the kind words on the bottom
DeleteSooo what did you do with the top part??
ReplyDeleteIt was given away to someone who could use it.
DeleteBeautiful work. You gave the furniture a new life.
ReplyDeleteThank you so very much, I love my job :)
DeleteI have the exact same dresser. I want to paint it. No plans for the top part though. Great job
ReplyDeleteThank you very much for sharing the kind words. Give it a paint ;)
DeleteHi! Do you know the brand of this dresser or the price?
DeleteHi I am not sure of the brand and sorry it sold right away Alexia
Delete