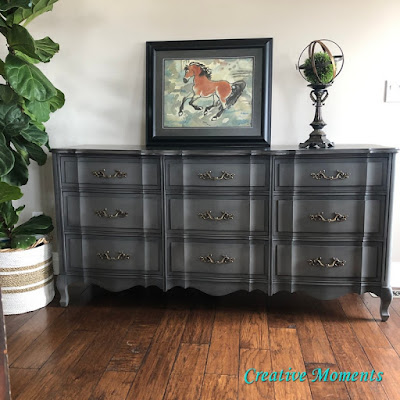
How about French Provincial dresser in shades of grey? I would love to hear your comments below.
I purchased this giant dresser sight unseen and when it arrived it was in rough shape.
The top had deep scratches and dings, the back was missing, drawers misaligned, chipped veneer and oh so dirty but the solid wood construction and pretty style would make all the work worth it.
Close up shows the dings and scratches but also the original finish crazed,
I stripped the top with a chemical paint stripper as step #1.
Areas needing wood filler were addressed and filled (see above right)
Then is was time to power sand it smooth. (left is sanded and the right side is not)
All sanded and super smooth, look at the lovely grain.
The curvy edges were then sanded carefully with the orbital sander followed by hand sanding.
 |
The entire top was now sanded and ready for the next steps. |
I slid the drawers all back in for this shot.
Some of the drawer frames were moved and reglued into place, clamping and letting dry well. As I mentioned at the beginning the back was missing which made this step allot easier.
The entire base was then hand sanded to smooth chips and dings and remove loose finish. I used a combo of retired sanding discs and Dixie
Belle sanding sponges.
Then everything was scrubbed inside and out, upside down to clean every surface using Dixie
Belle white lightening cleaner, warm water and a scrub brush. After everything was scrubbed well I hose it all with clean water, wipe with a clean towel and let dry well overnight.
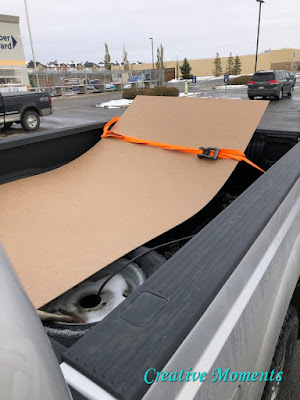
On to replacing the missing back. Here is a 4'X8' sheet of hardboard I picked up at my local Rona store.
With the help of my inhouse handyman we cut this sheet into smaller pieces.
The handyman and I secured the cut backing to the dresser using a power nailer.
This is the first coat, I applied a second coat the next day.
The base was next to be worked on. All surfaces were painted Dixie
Belle in hurricane grey.
However once it was put together the white was too stark, time for plan b as I loved the grey base.
I tried lightening the drawers first doing 2 test drawers. The bottom was done in a wash of manatee grey and the middle one was a combo of both colors. I put a poll out on Creative Moments Instagram and Facebook pages; the solid color had the most votes.
This is two coats of the white gel stain dry and sanded.
And this was the end result, again not quite to my liking.
Now back to the base, I wanted to add some drama to the solid grey without a variegated look like the top so applied Dixie
Belle midnight sky around the edges and blended in. YES!
All the drawers were set in yet again,
and the lower left drawer looks great so on to doing 8 more.
This gave the sides some drama too.
The only thing left was to do the detailed front pieces.
The original hardware was beautiful and just need a good cleaning. A thin green Scotchbrite scour pad buffed the higher areas for a perfect highlighted pull.
And this big beast has new life and one of a kind presence to make a statement in any bedroom. It actually sold with a sneak peek photo I shared before even listing it.
video tour
It was made by a Canadian furniture company called Malcom Better Built Furniture. And for sure it was well built and now after its makeover it is ready for many more years of service!
Isn't the top gorgeous?
another video tour view
Links to Dixie Belle products are for your convenience. My affiliation with this fantastic paint company does not increase prices on your end, your purchases via my links does however provide a small subsidy which allows me to keep providing these tutorials. Thank you!
FEATURED ON
Feb 14, 2021
Shared up at these link up parties


I love how this turned out! The color is perfect! Thanks so much for sharing it with us at Farmhouse Friday!
ReplyDeleteThank you Michelle, I really loved the end results too :)
DeleteAmazing makeover. My parents had French Provincial furniture in a white finish with gold. Wish I had it now. Thanks for sharing at Tuesday Turn About Link Party.
ReplyDeleteTHANK YOU, I appreciate that. All the ones I remember where white and gold too and always a fav when I was a little girl wishing for one. I decided though to go total opposite when refinishing this one as you can see :)
Delete