Want to update a wall in only a few hours with major impact results? See how I created this fabulous water color effect wall in my daughters bedroom using a Photowall premium wallpaper.
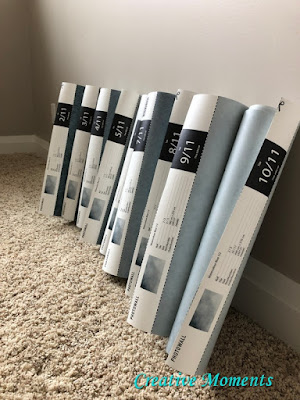
This is the panels and the wallpaper accessory kit along with the directions. Get familiar with what each pieces does and read the instructions well.
Step one; move furniture out of the way.
Be sure your wall is super clean, remove outlet covers and lay down some drop cloths.
Cut your panels at the marked lines with the straight edge and utility knife included in the assembly kit.
and set in order along a wall.

The first panel is the trickiest and MOST important. Panel 1 goes on the left and they move right in order marked at the top of each panel. Here I am just seeing how it looks on the wall.
My first panel also has to be cut to fit around the pony wall.
I am old school wallpaper trained and cut my paper prior to putting on the wall. Be sure to measure twice and cut once as this is a one shot deal. It is a mural so you cannot find a matching pattern farther down the roll.
Using a large plastic bucket, mix the powdered wall paper paste according to the included directions.
TIP: Note for the wall I did I only needed half the package in the end so in the future would mix only half up. Using the brush apply the paste about 2 panels wide on the wall.
This is how I applied the paste to start. In the past I have always used pre-pasted wallpaper so it was a bit of a learning curve.
Panel 1 must go up level for the rest to follow. Mark a level line the panel width away from the wall.
Hang the first panel with the edge along this mark. Smooth from the center out, up and down to remove any trapped air. Hang panel 2.
Then use the seam roller again in the kit to make the seams smooth and disappear.
Continue applying paste and panels from left to right along the wall.
My new paste applying technique
TIP; the kit includes a wide wallpaper brush but I prefer a damp washcloth to smooth my panels to the wall.
Panel 11 had to be cut as well. I hand cut it to a bit wider then cut on the wall using the straight edge and knife.
And in a few hours you will have a completely updated wall with loads of drama and impact. Check out Photowall and use this code ... creativemoments25 .... at checkout for 25% off
short video tour
UPDATE: I have a viewer suggest
using wall sizing before applying wall paper to help with future removal. Have you tried this and can you tell me if it worked?
Shared at these link up parties


Comments
Post a Comment