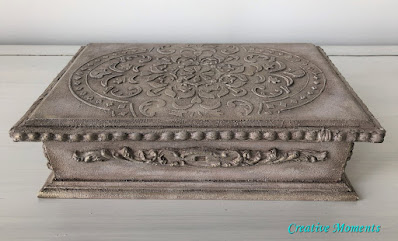
Faux stone / plaster finish jewelry chest in an aged finish using a variety of products to achieve this look. Let me share how I created it.
This is the sweet little chest, great bones for the design plan I have in mind. First step is to clean it well so the paint will adhere.
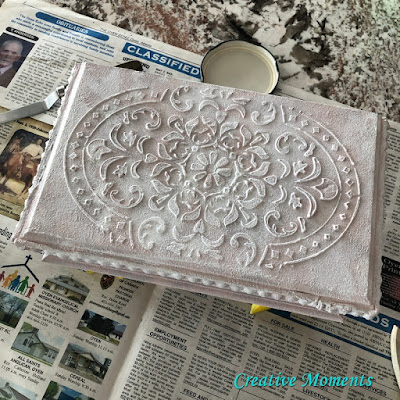
To add dimension and texture to the top, Country Chic Paint's embossing paste (discontinued) was applied over a tin tile stencil using an offset pallet knife. Lift the stencil to reveal the raised design.
I never like to waste any product, see above video how I save the excess embossing paste (sorry it is filmed upside down).
Now let the paste dry. Then it can be lightly sanded to smooth any real bumps using a
sanding sponge.
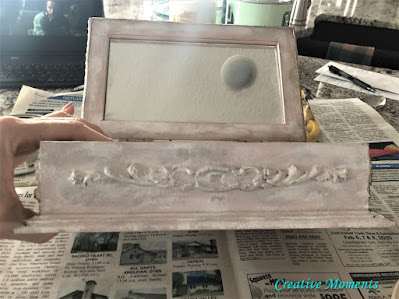
On the rest of the chest I added
iod moulds (detailed tutorial) made from acrylic caulking.
I apply the glue (I use
Titebond
glue ) with an artist brush and ensure all surfaces are covered
before pressing it in place.
TIP- DON'T use painter's tape as I did. The caulking really wanted to adhere to it when trying to remove it.
The moulds are easily trimmed and cut to size with scissors.
The above video shares a few questions I have been asked about this method.
Now all the raised design pieces are complete and it is time to paint.
For the colors of the jewelry box I chose Jolie
Paint's french grey and rose quartz. I enjoyed creating today with a memorial of my Grandfather smiling up at me from the newspaper below.
If you order
Jolie paint, here is a
code for 10% off INF-CREATIVEMOMENTS
To add further texture to achieve the faux stone/plaster look I added some Saltwash to the Jolie
Paint's rose quartz paint.
You can see other rose quartz projects HERE.
This mix was brushed in a stippled application all over the jewelry box to create the texture of faux stone.
Let it dry well.
Next layer is to dry brush on Jolie
Paint's french grey.
Followed by Jolie
Paint's palace white dry brushed.
This adds further dimension and depth to the piece.
Now to add even more dimension using Jolie's
brown
wax .
See how it brings the details to life?
Here is the top clear above and dark added below.
Then for a little white wax too. Layers make the difference here.
You can alternate and add to suit your desired look.
Now to add a little sparkle,
Jolie's gold gilding wax was applied using a very useful tool, a finger, to hit some high spots.
This adds yet another layer to the piece.
I am a brand ambassador and affiliate with Jolie, if you would like to order and receive discount off your order please use this code INF-CREATIVEMOMENTS, I guarantee will love their products.
Shared at these link up parties


Super awesome 👍
ReplyDeleteThank you so much so sorry for the delay in replying as this was found in an awaiting moderation folder ;(
DeleteVery pretty and so creative!
ReplyDeleteThank you so much so sorry for the delay in replying as this was found in an awaiting moderation folder ;(
DeleteAppreciate your kindness :)
I live this look. I'm subscribed to your blog but I dont think I have received any tutorials from you. Thank you for this one! You cant go wrong with Saltwash.
ReplyDeleteThank you so much so sorry for the delay in replying as this was found in an awaiting moderation folder ;(
DeleteSorry to hear no tutorials have arrived, please let me know if you would like me to add you manually to the list :)