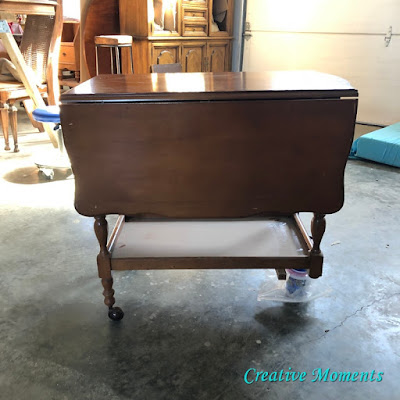
Check out this after and before for this solid maple tea cart, perfection right?
A very good customer sent me the above photo asking if I could refinish it in the same look as a recent
French Provincial coffee table I did. Why of course I can but it will take a bit of work. Let me share the many steps it took to create this new updated look.
When it was dropped off the wheels were super wobbly so the mechanically inclined husband took them back home to fix.
My new shop dog Harley has to inspect all pieces when they come into the shop. The sides pop up to increase the table surface, the handle slides out or tucks in and as well as the lower shelf there is a glass shelf that slides out either direction.
On the other side is a drawer for storage. Lots of space and storage in a portable rolling unit.
I started working on the top. The existing finish had chipped and was loose in many spots. It was necessary to remove the old finish to get a smooth surface. Using my trusty
carbide
scraper from Richard tools I began the process of removing the finish.
video
Here is the result of an hour and a half of patient slow scraping.
This gorgeous top is now ready to stain.
Here are the wheels all fixed up. Tiny nails were put in the spokes at the hub and wheel edges to secure and stabilize.
The most important step is next; scrubbing the entire piece. ALL grease, grime and grunge needs to be cleaned off to prep the surface to paint.
I use warm water, a bit of dish soap and some
TSP Alternative along with various sized scrub brushes to get in all the nooks and crannies inside out and upside down. Wipe with a towel so no sitting water and let dry.
Tipping on its side allowed me to get in and under the edges and have a better painting vantage. The first coat that went on was a coat of
Fusion
Mineral Paint discontinued product called
concealer. This product was made of left over paint that was reused to transition between colors to save money as it was cheaper then the actual paint. I like to use my
Cling On short brush for this project.
There are always a few little repairs on vintage pieces.
DAP
wood pro was used to fill areas of chipped out wood; once dry they are sanded smooth. You can see the wee nails used in the repair better in this close up.
The edges were missed when scrapping the top so once folded down I used my smaller
carbide scraper from Richard tools. It fits perfectly in that smaller space. The rest of the edges were sponge sanded smooth to prepare for paint.
Time to stain the top.
It is a gorgeous color and picks up the grain and wood imperfections and gives a beautiful rustic country feel.
Inspector Harley is back to check the progress.
Here is the parts table with concealer coat on all and one coat of
Fusion Mineral Paint in Champlain.
I needed to use a small artist brush to paint the table top edges.
Two coats were brushed on for a total of 3 light coats. It may surprise some but white is one of the most labor intensive colors to paint as it always needs more coat and the upmost of prep.
Three coats on the parts as well. Then it was time to distress it. This step seems counterproductive after painting the 3 coats carefully but it adds character back into the piece to keep it feeling vintage and worn.
Distressing video
The final step also adds to the vintage vibe; it is the dark waxing step.
Fusion Mineral Paint's wax in espresso was brushed in the nooks and crannies and along the edges for a further aged look.
Once I put the wheels back on I saw areas looking down that needed touching up. An even smaller artist brush worked for these tiny areas.
The top has 4 coats of the Homestead House
Stain Oil Finish. I like to use a paper bag and sand after each coat has dried over night. This technique works of the painted surface as well leaving a super buttery smooth feel.
video tour of the tea cart
The knob was scrubbed and put back on then the drawer and sliding shelf put back in and this beauty is complete. I would love to hear what you think of this changeup.


I simply love it. Great job.
ReplyDeletethank you Rebecca so much for the kind words, it warms my heart :)
DeleteThis tea cart is amazing! Wonderful makeover!!!
ReplyDeleteTHANK you I very much appreciate the time you took to share these kind words :)
DeleteHi, I wish you had a video of your husband fixing the wobbly wheels.How did he place the nails and are these any special nails?Please help!
ReplyDeleteWarm regards,
Margo
Hi Margo, sorry I do not have the information as the customers husband fixed them before dropping off. :(
Delete