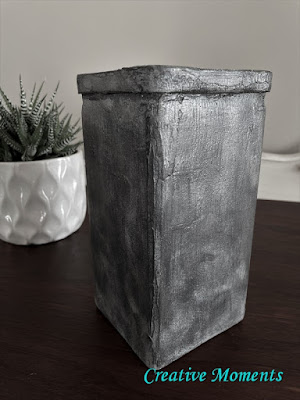
I had these square vases and always visualized them as done in a cement like finish so that is what I did. I did each one in a different look so this tutorial is quite long ;)
I have also done other vases in a modern farmhouse collection, a beach vibe collection, a turquoise patinaed collection and a concrete planter.
First step is to scrub them well so the products will adhere to the glass. I used warm soapy water with some Dixie
Belle white lightening cleaner. Rinse clear with hot water and let dry.
Next to mix my "cement" ; I mixed Saltwash (a powdered texture additive) with Dixie
Belle Paint in hurricane grey. Dixie Belle has a product called sea spray that would have been similar to the Saltwash to add texture to the paint but I do not have it as of yet. It is on my wish list ;)
The 2 were mixed together about 1:1 to make a thick icing like mix. Each of the pieces had a thin coat brushed on with Dixie
Belle chip brush a as a primer coat.
Using my offset pallet knife a second coat was applied smoothing on just like cement or like icing a cake.
I chose 2 other greys from the Dixie
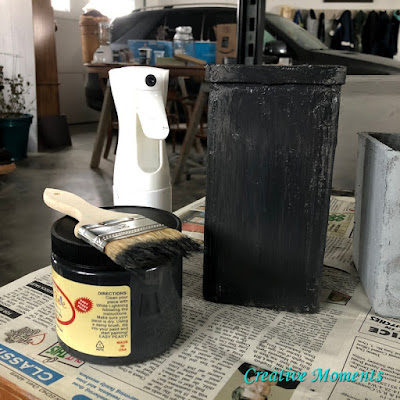
Belle Paint line; a dark charcoal called midnight sky and a light grey called manatee grey. On the above vase I brushed the mix thicker and random to create even more texture.
Followed by the manatee grey sponged randomly too. It is good to have a Fine
Mist Spray Bottle on hand too to dampen brush tips or the sponge as you go to blend.
On the short vase the manatee gray was sponged all over in random directions over a much smoother cement coat.
On the thicker vase midnight sky was brushed all over with a chip brush sprayed with Fine
Mist Spray Bottle to make more of a wash.
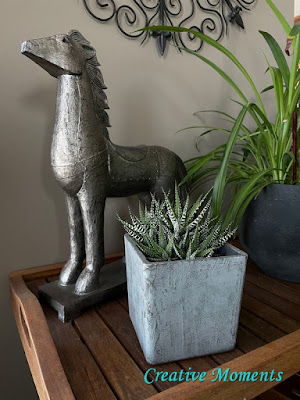
Ten they were all left to dry overnight. The plant pot in the background was "cement" finished as well and on a separate tutorial.
The next morning all the vase surfaces were sanding to reveal the layers and smooth edges with a handy Dixie
Belle sanding sponge.
The sanding adds (right side) but I wanted to add even more texture so manatee gray was sponged on to this vase as well (left side). See how all 3 look so very different? Which is your favorite so far?
I think this one is my favorite :)
check out the video view for a 3D look
This super cute antique crate joined the staging process.
Please enjoy scrolling thru the various photos, I tried to get all angles to give you a good look at the finish. If you are interested in one they are available on my Facebook page.
Links to Dixie Belle products are for your convenience. My affiliation with this fantastic paint company does not increase prices on your end, your purchases via my links does however provide a small subsidy which allows me to keep providing these tutorials. Thank you!
Featured On these blogs!
Shared up at these link up parties


These are so neat. I have all the materials so I have to try this. Do you have the link for the tutorial for the round case you made?
ReplyDeleteThanks Cheryl, that is awesome, I hope you enjoy making one.
DeleteWhich round case?
Love them! Thank you for sharing with us at the To Grandma's house we go link party - you're going to be featured!
ReplyDeleteThank you for the kind words and the feature!! excited to be part of your parties
DeleteThese look amazing! I've recently made some candlestick holders with a cement like finish using normal tissue and chalk paint to create the texture. I'm saving your tutorial to try out next time. Thank you!
ReplyDeleteThank you Kasia, appreciate your kind words and for stopping by. Cheers!
DeleteThe white ones in the back
ReplyDeleteThose are a lovely set of 3 from Costco that my succulents came in, I love them too
DeleteJust love these, Lee Ann! So creative and trending! I'm delighted to be featuring your post at Tuesday Turn About this week!
ReplyDeleteThank you for the feature Julie!! I will be stopping by for my usual weekly link up :)
DeleteThese look great! I'm so impressed. :) Visiting from the Wednesdays in the Studio linkup.
ReplyDeleteThank you for the kind words and for stopping by!!
DeleteThe shape of those glass vases are perfection for this faux concrete effect! The outcome is so realistic! Well done!
ReplyDeleteThank you Donna, I agree on the shape being perfect, thanks for featuring them on your link up party too
Delete