Learning curve underway. There are adjustable fan and heat settings.
This video show the end result after about 10 minutes of heating and scraping and the paint scraps, that was pretty easy so far.
Subscribe to this Blog ~ Follow me on Instagram
Follow me on Pinterest ~ Follow me on Facebook
Now for the large sides. I tried with the gun and scraper from same side but it does not seem as efficient but it works.
yep there is wood under that paint
Then got a better system going heating the paint ahead of the scraper then directing
the gun towards the scraper as I added pressure. I am a fan and look forward to trying this on a few more projects this winter.
All sides were successfully stripped taking over 3 hours. I attempted the back but decided it needed some pizazz so popped off the back to add wall paper to.
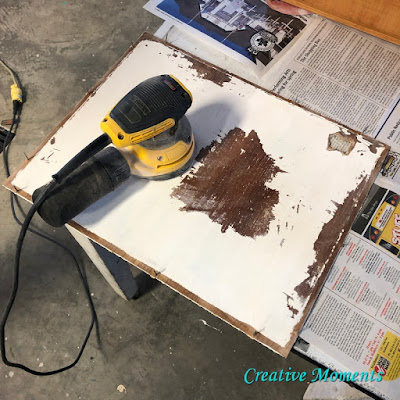
It is indeed wood but veneer so carefully all surfaces were hand sanded smooth.
Of course almost every piece has at least one minor repair, this drawer needed a piece of the veneer reglued and clamped till dry.
The downside of other people's paint jobs is sometimes they are quite messy. This is the underside of the top that was not easily removed. A customer called this cutie and guess what? They wanted it painted a warm white so I left the painted legs having hand sanded them smooth.
Now that everything was stripped and or sanded it was time for a deep clean. This is a huge step that never should be skipped. I like to scrub my pieces with a scrub brush in a bucket of warm water, a bit of soap and some
Fusion TSP
Alternative.
Look at how dirty that water is.
Every side inside upside down and sideways gets scrubbed. Then all is rinsed and seeing it is veneer and I don't want any lifting it was hand dried with a towel and left to dry well.
The underside has sloppy painting as well so I removed the legs and gave it a power sanding with my orbital sander as clean as I could.
The back was power sanded as well to make a nice smooth surface for my wall paper to adhere to. I like to reuse the original pieces when I can as they are 1: original and 2: cut to fit already.
The wood veneer had many marks and stains so painting it was not a terrible thing after the many hours of stripping it.
Allow this to dry overnight.
The next coat was the warm white; Champlain from
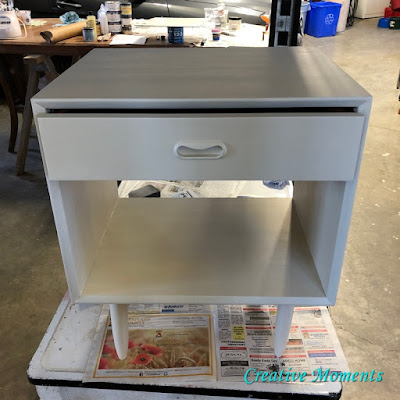
Fusion Mineral Paint. Two coats of this were brushed on in total, this is the first coat.
Now for the back board. I cut the wallpaper to size but wouldn't you know it somehow the piece was to short!! Good thing I had not done the drawer yet as it worked to cut and fit in it.
Then a new accurate measure twice cut once piece was cut for the back and applied.
Then the backing was put back on and hammered securely in place.
It looks great don't you think?
Now here it is all together but we have one more step so that it will match
the square mirror the buyer purchased from me earlier this year. This set will go in her entry way.
To match we needed some dark wax, hello ageing
Fusion Furniture
Wax. It was brushed along the edges to create that aged look.
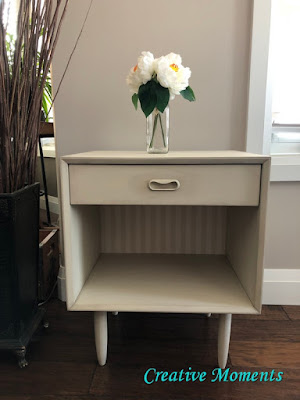
Now it is completely done and a perfect match.
I love the classic yet fun striped wallpaper additions.
This MCM table was built by Punch Design Inc Furniture Craftsmen, A
Canadian company out of Montreal circa 1965.
I think it now has many more years of use ahead of it thanks to their craftsmanship and my reloving.
Big thanks to
Wagner and
Fusion Mineral Paint for sponsoring this paint project. There are no affiliation kick backs for either company just links for your convenience ;)
Shared up at these link up parties


I love this nightstand and the color.
ReplyDeleteThank you so much so sorry for the delay in replying as this was found in an awaiting moderation folder ;(
DeleteBeautifully done! I love that you stripped it right down and did it right.
ReplyDeleteGreat work!
Thank you so much, me too :) so sorry for the delay in replying as this was found in an awaiting moderation folder ;(
Delete